Install and Uninstall SCOM 2012 R2 UR11 agent updates from a command line

A customer was building a SCCM package to update SCOM Agents.  They needed the command lines to install and uninstall UR11.

Patch Install command

msiexec.exe /p "C:\temp\KB3183990-AMD64-Agent.msp" /qn

Patch Uninstall Command

msiexec  /I {786970C5-E6F6-4A41-B238-AE25D4B91EEA} MSIPATCHREMOVE={1BEA7876-9751-4F7D-B0F3-AA920CF39FE8} /qn

The tricky part was getting the Uninstall GUID. You can get the GUID by using ORCA.

In ORCA load the msp file. Then go to View Summary Information.

patch


They also needed a way to get the version information to know if it was installed or needed to be installed.

Here is a quick vbscript to get that information.


Set objShell = WScript.CreateObject("WScript.Shell")
sngVersion = objShell.RegRead("HKLM\SOFTWARE\Microsoft\Microsoft Operations Manager\3.0\Setup\InstallDirectory")

Set objFSO = CreateObject("Scripting.FileSystemObject")
fileVer = objFSO.GetFileVersion(sngVersion & "Tools\TMF\" & "OMAgentTraceTMFVer.Dll")

If fileVer = "7.1.10285.0" Then

 Wscript.echo "UR11 Installed"

Else

Wscript.echo "Not Installed"

End If
Continue Reading

Stop the madness of having outdated SCOM Agents in your environment

I have seen many SCOM environments where it takes multiple teams to update a single SCOM Agent to the latest Update Rollup.   Often it takes months or even years to update all Agents to the latest Update Rollup.  I created two management packs to make it easy to keep all your agents up to date.  With these Management Packs your Application Admins, Server Admins or SCOM Admins can update their servers when they feel comfortable or have an open change window without requiring admin permissions.

Management Pack 1: Contoso Agent Update Rollup

Download: Link

  • Discovers all Agents and their Update Rollup version
  • Monitors and alerts if agents don’t have the latest Update Rollup
  • Task to install the Update Rollup.  Only permissions required is Operator with permission to run the task. 

Management Pack 2: (Optional) Contoso Agent Update Rollup FileDeploy

  • Deploys out latest Update Rollup to Servers.

Download: Link


Getting Started

Management Pack 1  (Contoso Agent Update Rollup)

1.) Install Contoso Agent Update Rollup Management Pack
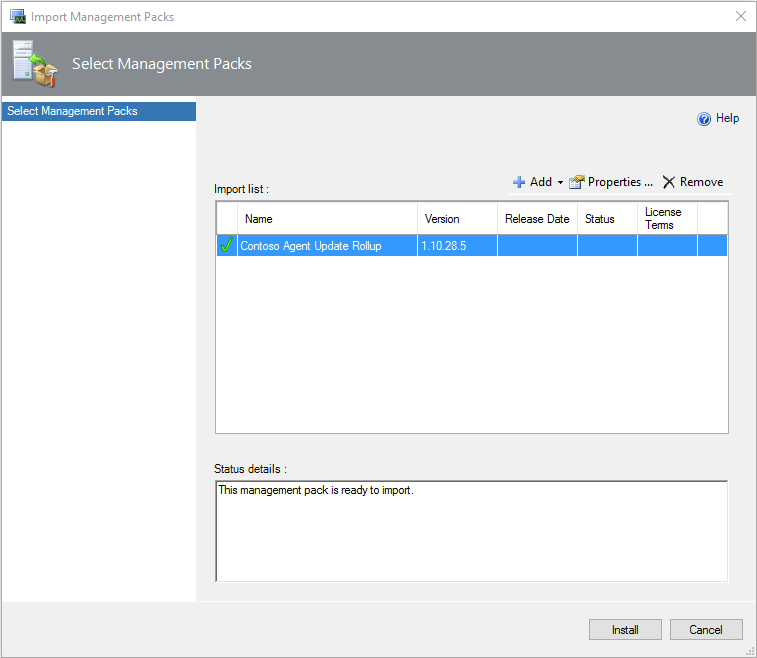
importmp1


2.) Download UR11 from here, extract and copy the msp file to a folder on one of your management servers or on a file server that you can set permissions on.

msp1

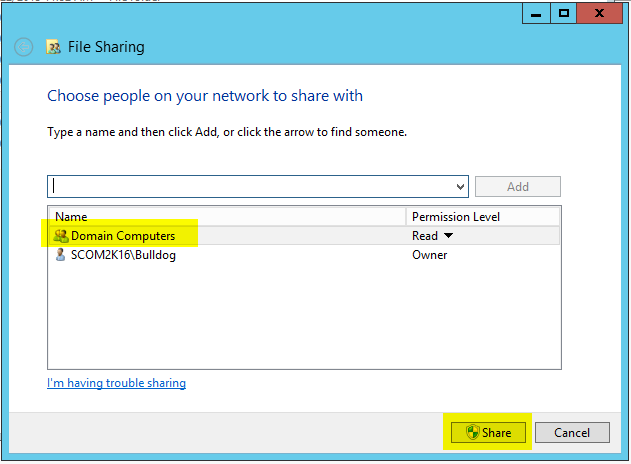
3.) Share out the file to all Domain Computers, or you can individually add each server you want to give access to the patch.
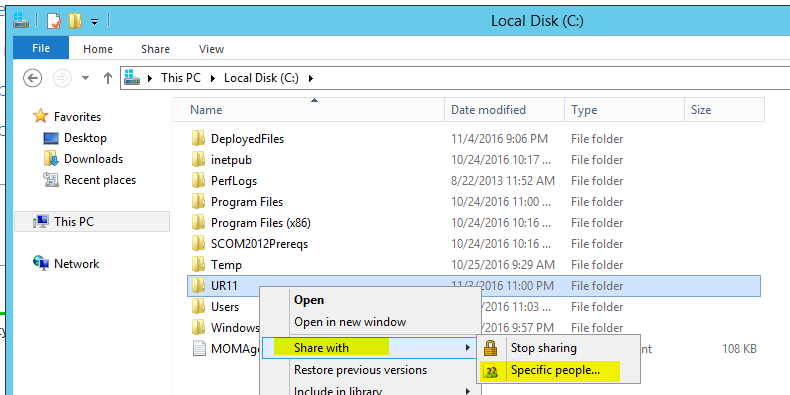
createshare

share2


4.) Open up the SCOM console, a new folder called Contoso Update Rollup will now show up

Expand that folder and click on the State View.

You can see I have two servers in my environment.  One has UR11 installed and one that is still at RTM
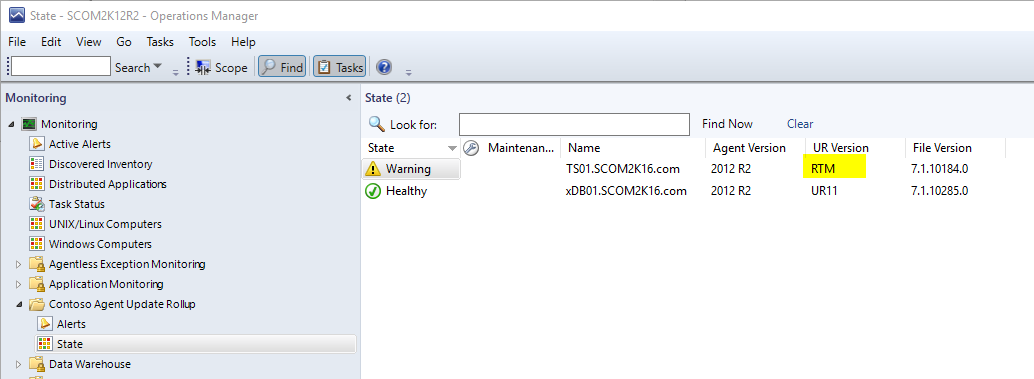
state1

5.) To install the update on one or more servers I select the servers and click the Task called “Install Update Rollup”

install

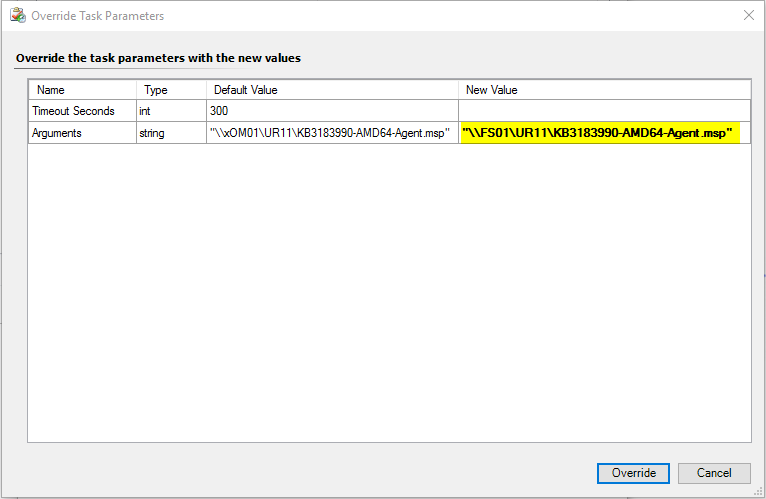
You can see the default is my file location.  You need this to be the location of the file you shared out.  Click override and enter the location of your update rollup patch file.  Make sure you add double quotes around the location.filelocation
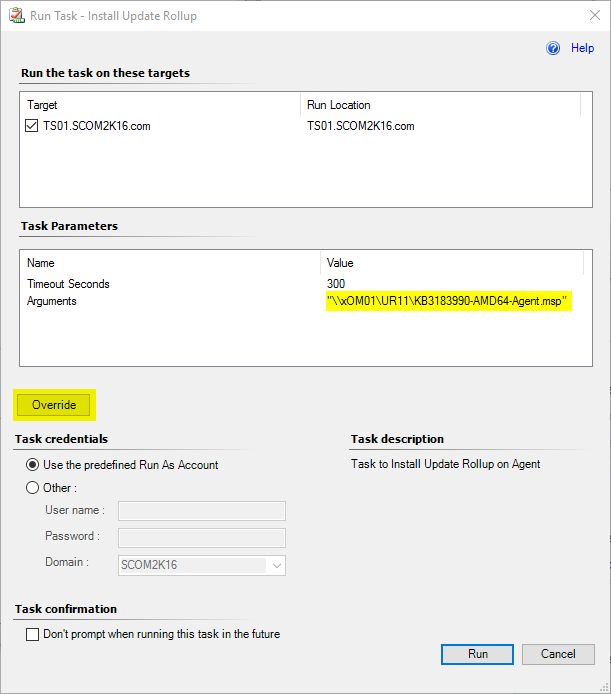
newlocation


Side Note: If you don’t want to do this every time.  You can modify the xml and re-import the mp.  Just search and replace for the line (Make sure you include double quotes) <Arguments>”\\xOM01\UR11\KB3183990-AMD64-Agent.msp”</Arguments>

arguments

6.) Verify everything is correct and click run.
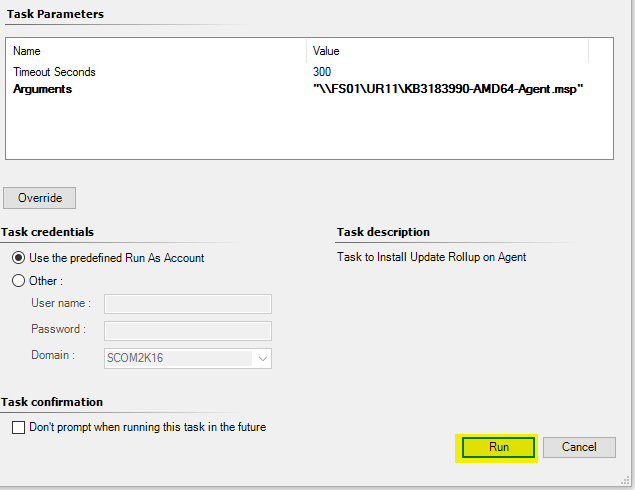
click-run


The task will run and output the results.
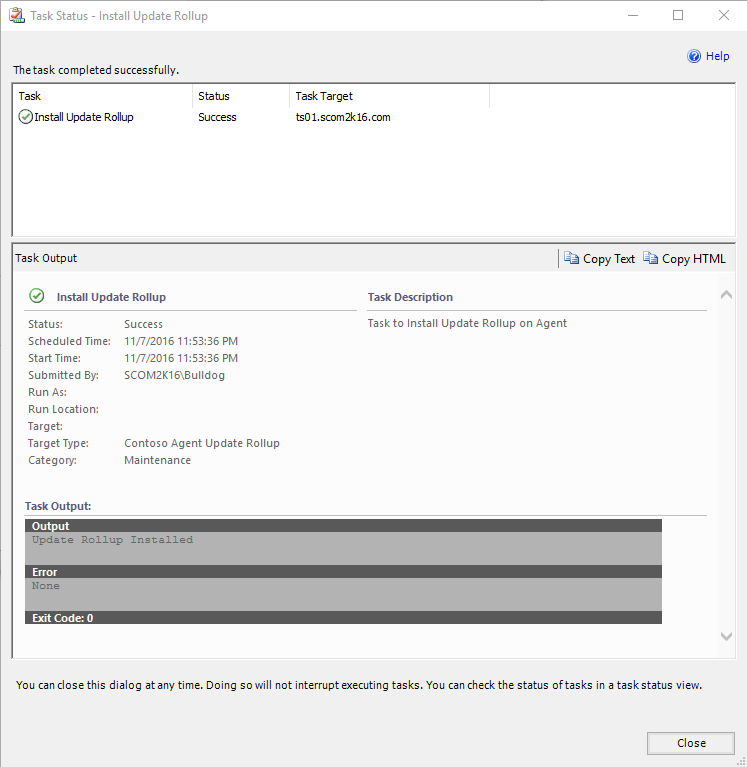
taskstatus

7.) After about 10 minutes.  Go back and check the state view.  The server should now show the updated UR Version and File Version
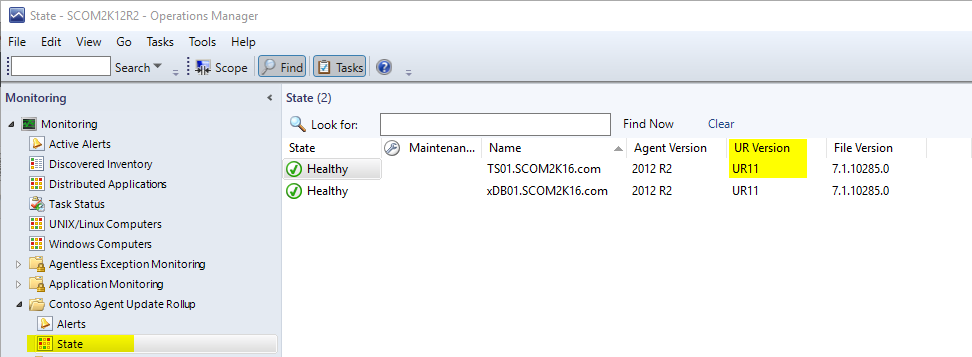
sucess

Management Pack 2 (Optional) Contoso Agent Update Rollup FileDeploy

For those who are not able to or don’t want to create a share for all domain computers for security reasons.  I have another option.  This management pack will embed the update rollup file in a management pack and deploy it to the servers.  Then you can use the task in management pack 1 to update the agent with a file on the local system.

For legal reasons I have not included the management pack containing the update rollup, but I will include the project so you can quickly build your own.

How to build the Management Pack File

1.) Open the Solution by double clicking on the .sln file.  This will open the file in visual studio.
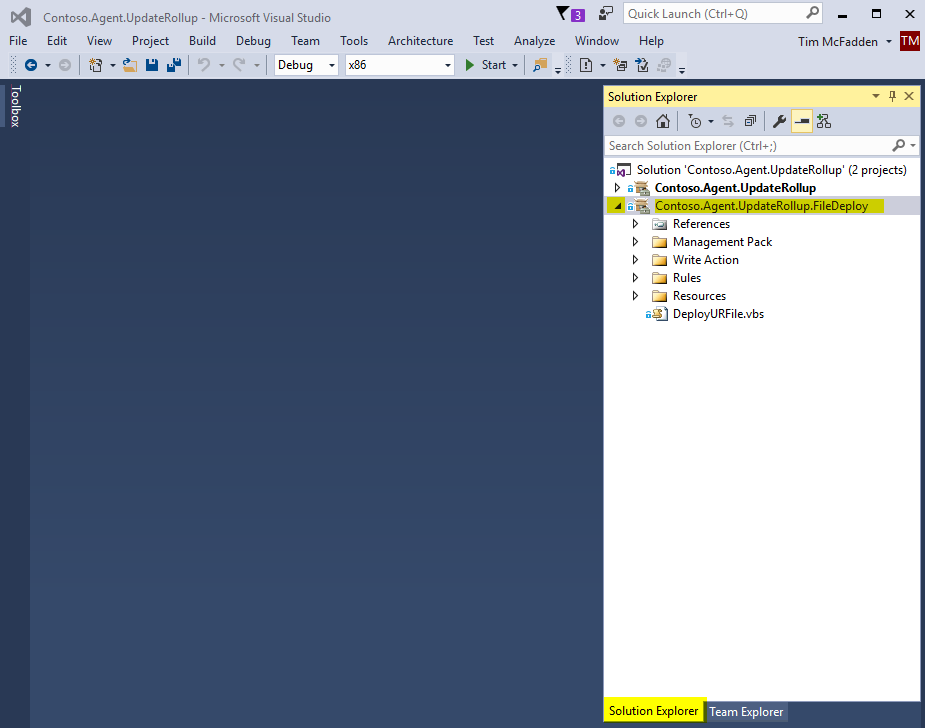
visualstudio


2.) Select the Resources folder.  Right click Add Existing Item.

expand


3.) Pick the drop down to show all files.  Then browse to to where you have the Agent UR file located.
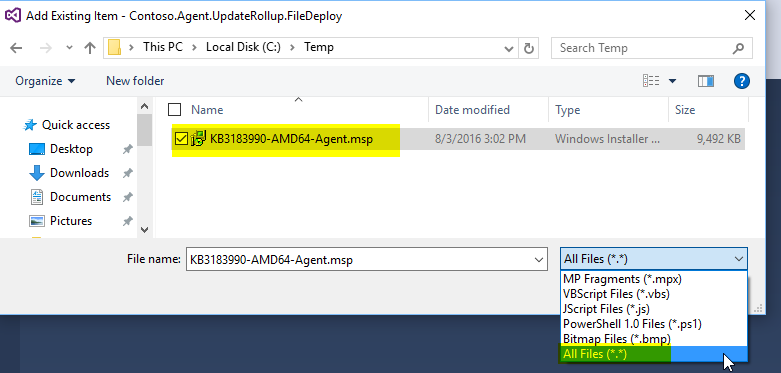
clickonfile

4.) Click on the file now and for Build Action choose Embedded Resource
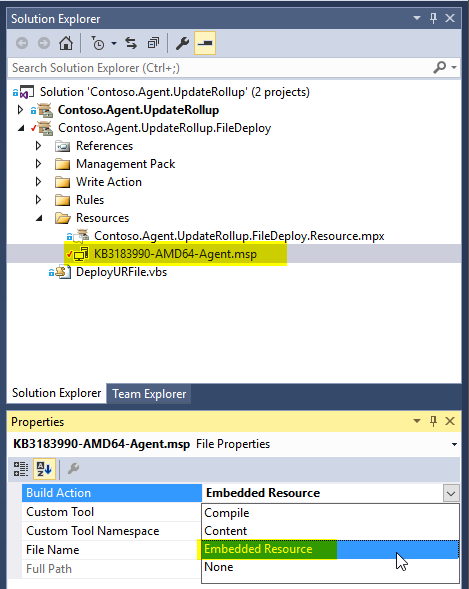
embed

5.) Check that the Contoso.Agent.UpdateRollup.FileDeploy.Resource.mpx file has the correct file name.  This may need to be changed if you are using a newer or older update rollup then UR11.

filedeploy

6.) Build the solution under Build, Build Solution

build


7.) Browse out to the build location.  You should see a file called Contoso.Agent.UpdateRollup.FileDeploy.mpb

location


8.) Import the MPB Management Pack into SCOM.

After 10 minutes check your agents to see if the file was deployed.
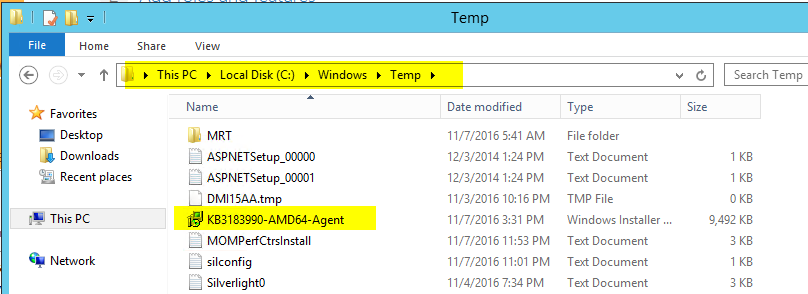
filedeployedsucess

The default location is C:\Windows\Temp  *Note this can be changed directly in the MP’s XML or with an override to the rule called “Contoso Agent UpdateRollup File Deploy”

Now you can run the task in Management Pack 1 with the local file location.
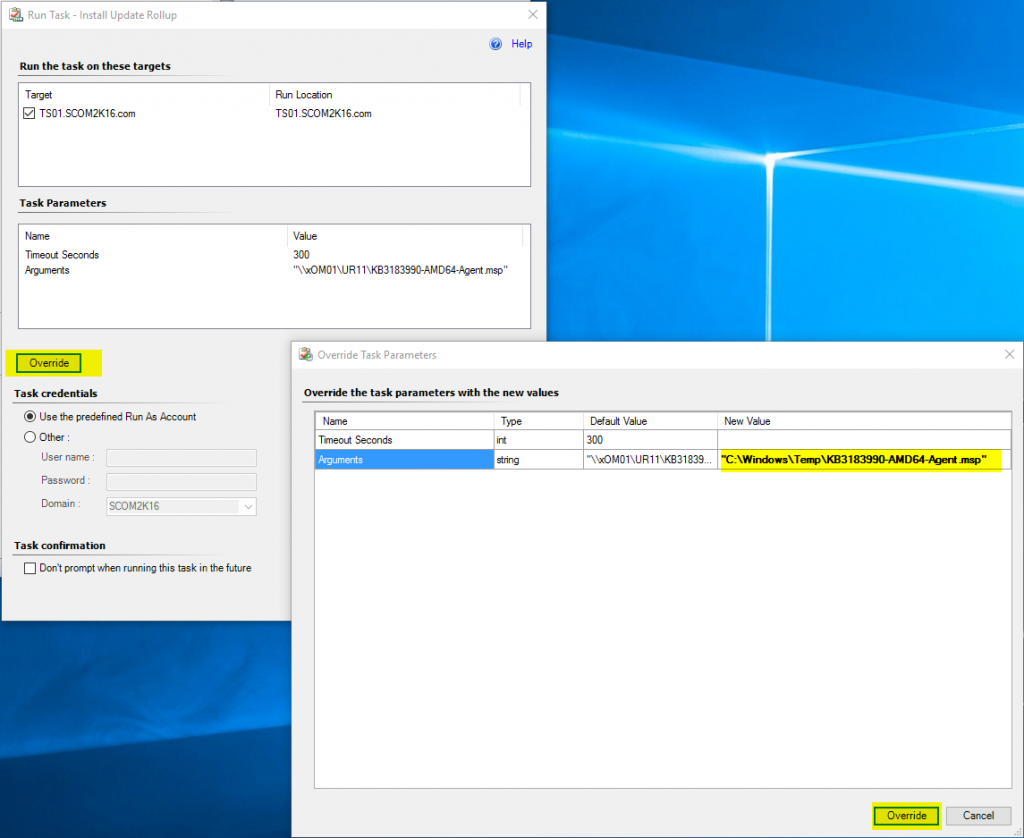
override2


Continue Reading

Automatic Alert Resolution in SCOM

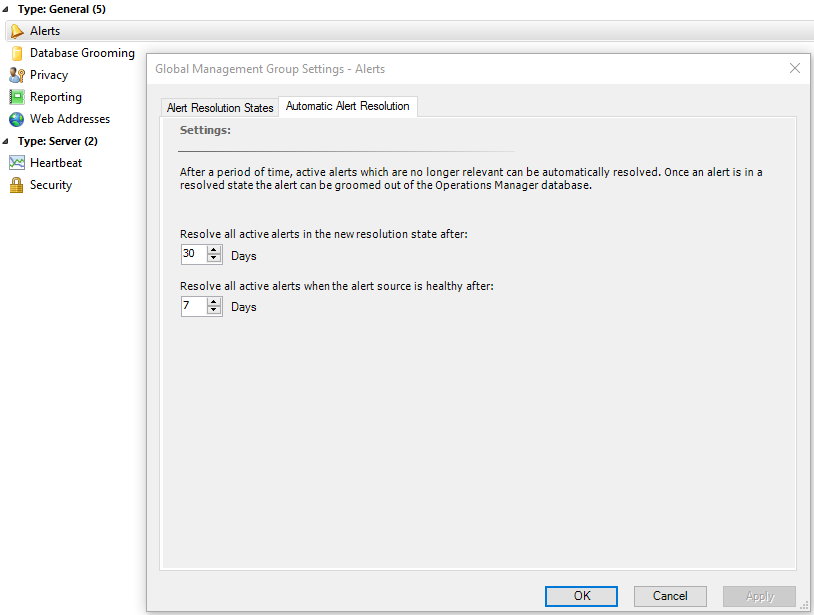
One of the more confusing screens in SCOM is the Automatic Alert Resolution settings screen.

The text is very vague as to what is does.  Kevin Holman recently updated his blog post to clearly identify what they mean.

You can read the excellent full post here.  https://blogs.technet.microsoft.com/kevinholman/2007/12/13/how-grooming-and-auto-resolution-work-in-the-opsmgr-2007-operational-database/

To sum it up:

Resolve all active Alerts in the new resolution state after: =   “Resolve ALL alerts no matter what source (rule or monitor), as long as they haven’t been last modified within “30” days. (where 30 days is the default value)”

Resolve all active alerts when the alert source is healthy after:“Resolve all MONITOR based alerts where the targeted object has returned to a healthy state, and hasn’t been last modified within “7” days. (where 7 days is the default value)”


Alert


Continue Reading

How to Delete SCOM 2012 R2 Managed Computers using PowerShell

Usage

DeleteSCOMAgents.ps1 -MSServer "zOM01.scom2k12.com" -AgentComputerName "xSP01.scom2k12.com", "xDV02.scom2k12.com"

deleteAgents

Download Script: Link

Script:

Param(
  [string[]]$AgentComputerName,
  [string]$MSServer
)

[System.Reflection.Assembly]::Load("Microsoft.EnterpriseManagement.Core, Version=7.0.5000.0, Culture=neutral, PublicKeyToken=31bf3856ad364e35")
[System.Reflection.Assembly]::Load("Microsoft.EnterpriseManagement.OperationsManager, Version=7.0.5000.0, Culture=neutral, PublicKeyToken=31bf3856ad364e35")


function New-Collection ( [type] $type ) 
{
	$typeAssemblyName = $type.AssemblyQualifiedName;
	$collection = new-object "System.Collections.ObjectModel.Collection``1[[$typeAssemblyName]]";
	return ,($collection);
}


# Connect to management group
Write-output "Connecting to management group"

$ConnectionSetting = New-Object Microsoft.EnterpriseManagement.ManagementGroup($MSServer)
$admin = $ConnectionSetting.GetAdministration()


Write-output "Getting agent managed computers"
$agentManagedComputers = $admin.GetAllAgentManagedComputers()

# Get list of agents to delete
foreach ($name in $AgentComputerName) 
{
    Write-output "Checking for $name"
    foreach ($agent in $agentManagedComputers)
    {
        if ($deleteCollection -eq $null) 
        {
            $deleteCollection = new-collection $agent.GetType()
        }

        
        if (@($agent.PrincipalName -eq $name))
        {
	    Write-output "Matched $name"
            $deleteCollection.Add($agent)
            break
        }
    }
}

if ($deleteCollection.Count -gt 0) 
{
    Write-output "Deleting agents"
    $admin.DeleteAgentManagedComputers($deleteCollection)
    if($?){ Write-output "Agents deleted" }
}


Continue Reading

How I re-build my laptop in minutes vs hours using PowerShell and Chocolatey

I re-build my laptop about every 3 to 4 months.  The old way was to Install Windows 10, then eventually install software I had missing as I needed it. I wasted lots of time searching for, downloading and installing the many different apps I use daily.


The New Way with PowerShell and Chocolatey

    1. Install Windows 10
    2. Open up PowerShell as an administrator
    3. Set my PowerShell Execution Policy to Remote Signed
Set-ExecutionPolicy RemoteSigned
    1. Install Chocolatey from an elevated command prompt
@powershell -NoProfile -ExecutionPolicy Bypass -Command "iex ((new-object net.webclient).DownloadString('https://chocolatey.org/install.ps1'))" && SET PATH=%PATH%;%ALLUSERSPROFILE%\chocolatey\bin


CMD

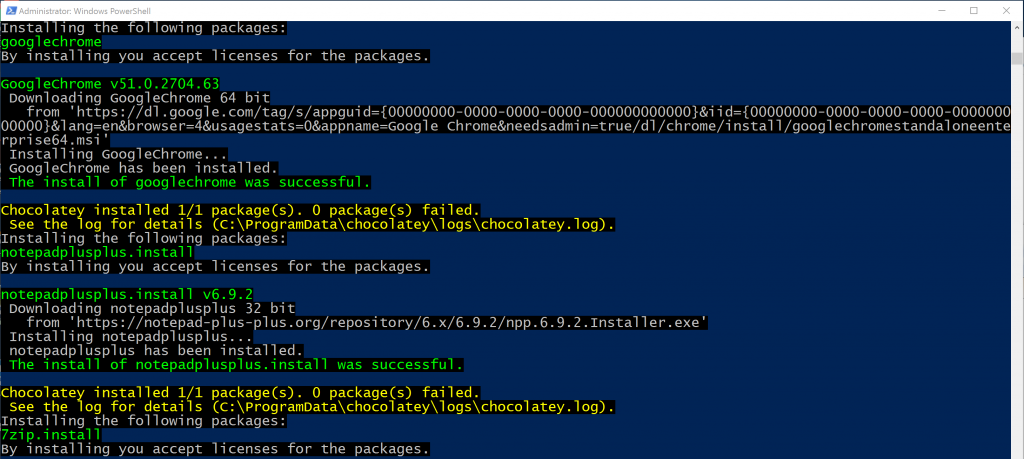
  1. Run my PowerShell Script to install the software I want

Script

iex ((new-object net.webclient).DownloadString('https://chocolatey.org/install.ps1'))

choco install googlechrome -y

choco install notepadplusplus.install -y

choco install 7zip.install -y

choco install rdcman -y

choco install greenshot -y

choco install adobereader -y

choco install vlc -y

choco install filezilla -y

choco install sysinternals -y

choco install putty -y

choco install winscp -y

choco install windirstat -y

choco install visualstudiocode -y

Install


For more packages see the Chocolatey Gallery https://chocolatey.org/packages


I also install the SCOM console from my file server using PowerShell

$dwnld = "\\FileServer\Software\SCOM 2012 R2 RTM\Prerequisits"
if (!(Test-Path -path $dwnld))
 {
 New-Item $dwnld -type directory
 }

Write-Host "Downloading and installing SQLSysClrTypes prerequisite...." -ForegroundColor Magenta
Start-Sleep -s 5

msiexec /qb /i "$dwnld\SQLSysClrTypes.msi" | Out-Null

Write-Host "Checking download folder location exists...." -ForegroundColor Yellow
Start-Sleep -s 5


Write-Host "Downloading and installing ReportViewer prerequisite...." -ForegroundColor Magenta
Start-Sleep -s 5

msiexec /qb /i "$dwnld\ReportViewer.msi" | Out-Null


Write-Host "Downloading and installing ReportViewer prerequisite...." -ForegroundColor Magenta
Start-Sleep -s 5

#Install OM Console
msiexec /qb /i "$dwnld\OMConsole.msi" | Out-Null


Download my script: Link

Continue Reading

SCOM 2012 Maintenance Mode Scheduler Version 8

New Features in Version 8

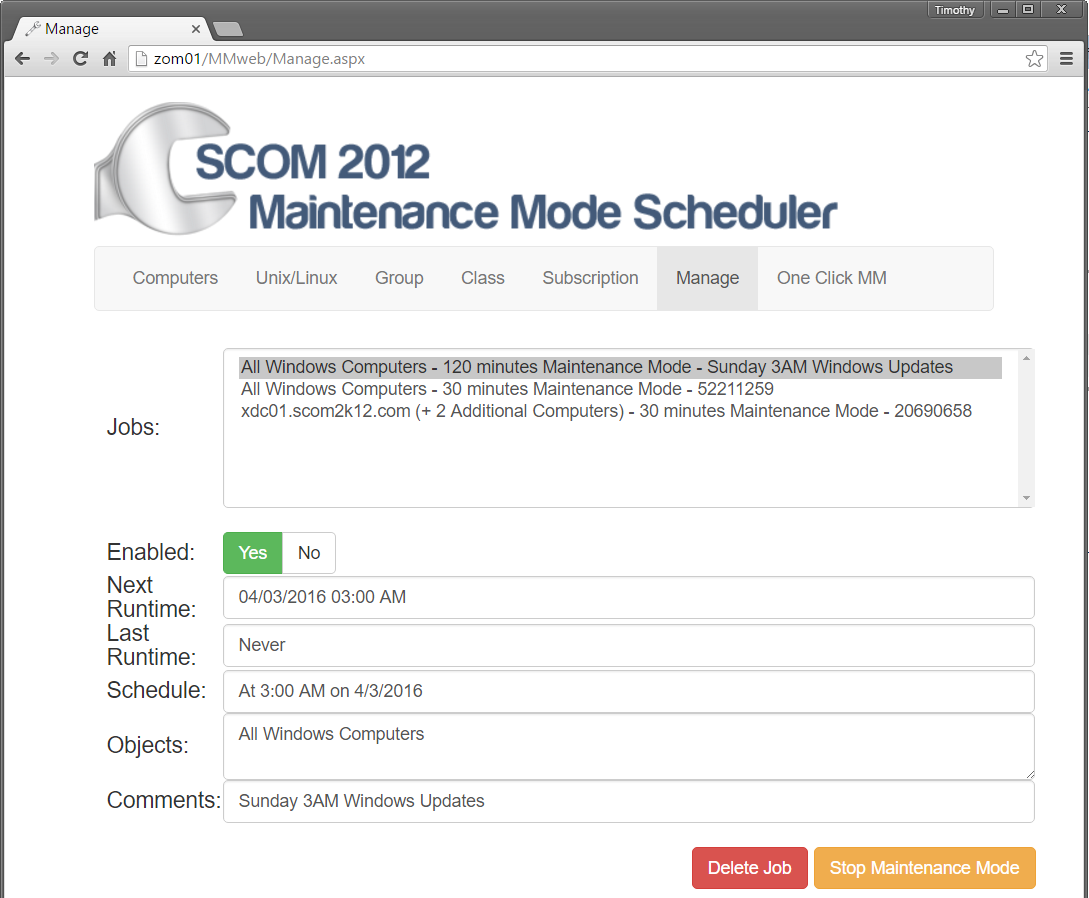
  • STOP Maintenance Early – Now if you have a maintenance window that is completed early.  You can stop the job early by going to the manage page and clicking the Stop Maintenance Mode button.
  • NETBIOS Windows computers fixed – Fixed bug where windows servers that show up only with netbios names were not going into maintenance mode.
  • Improved Manage Page – Manage page now is simplified with less buttons.
Download Now

ManagePage

Continue Reading

Scheduling Clusters into Maintenance Mode

How so Schedule Clusters for Maintenance Mode

Go to the Class Page

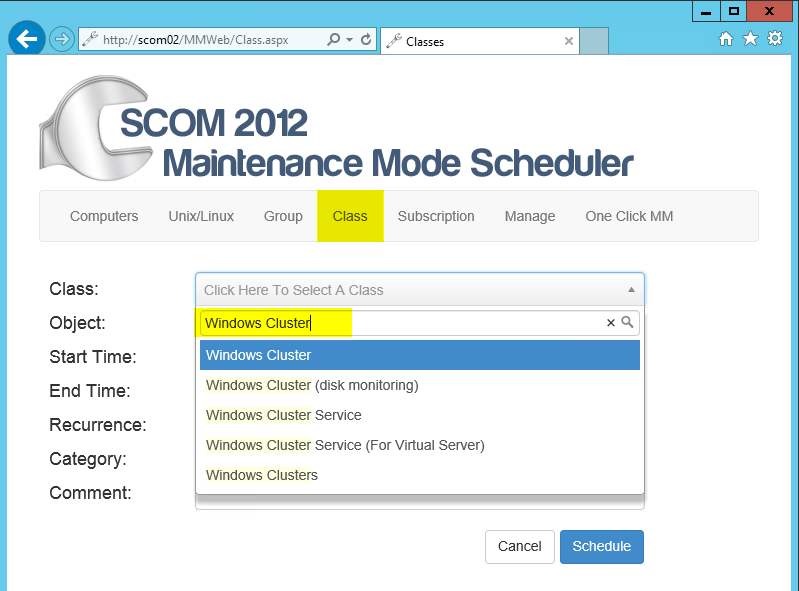
Under Class type in Windows Cluster

Windows Cluster


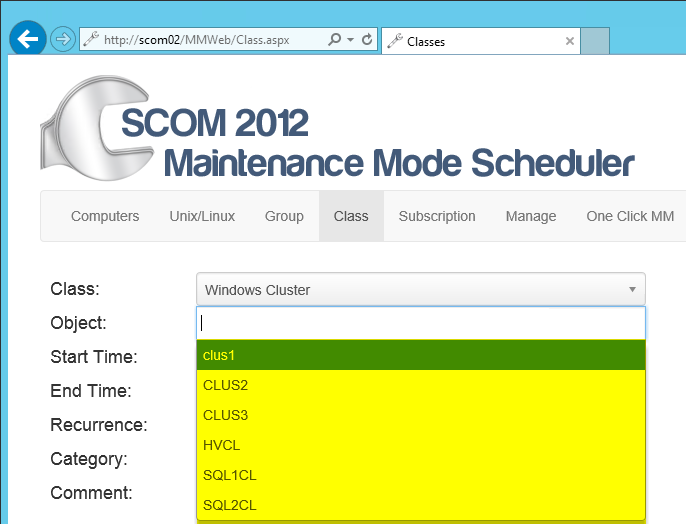
Select the cluster you want to schedule for Maintenance Mode.  In this case I select clus1

Cluster2


Set your Start Time, End Time and Recurrence etc..

Click the Schedule Button

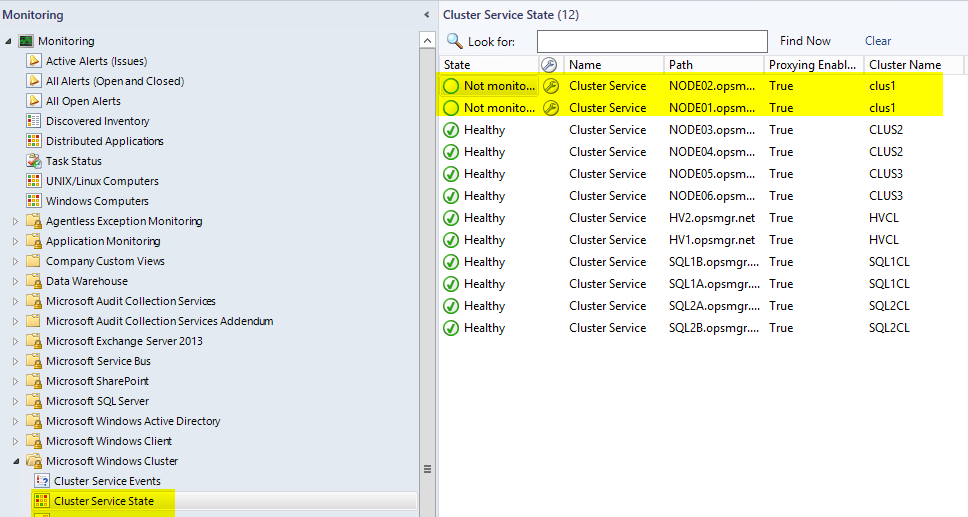
Verify the entire cluster went into maintenance mode.


Windows Computers Node1 and Node2

State1a


Cluster Service State

State1

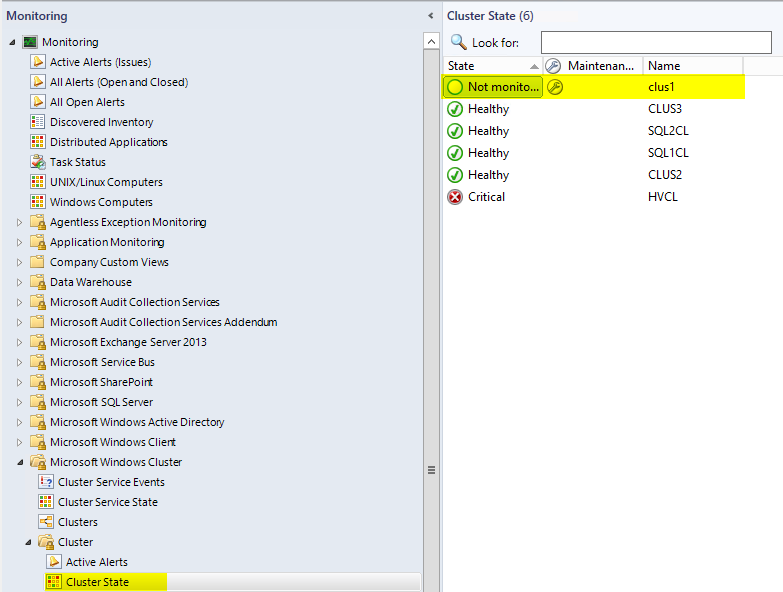
Cluster State

State2

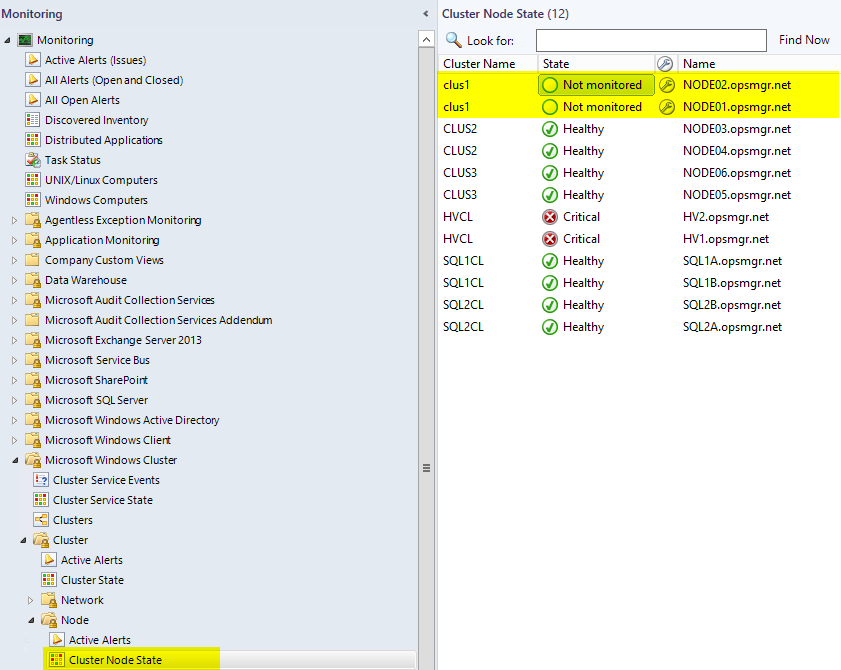
Cluster Node State

State3

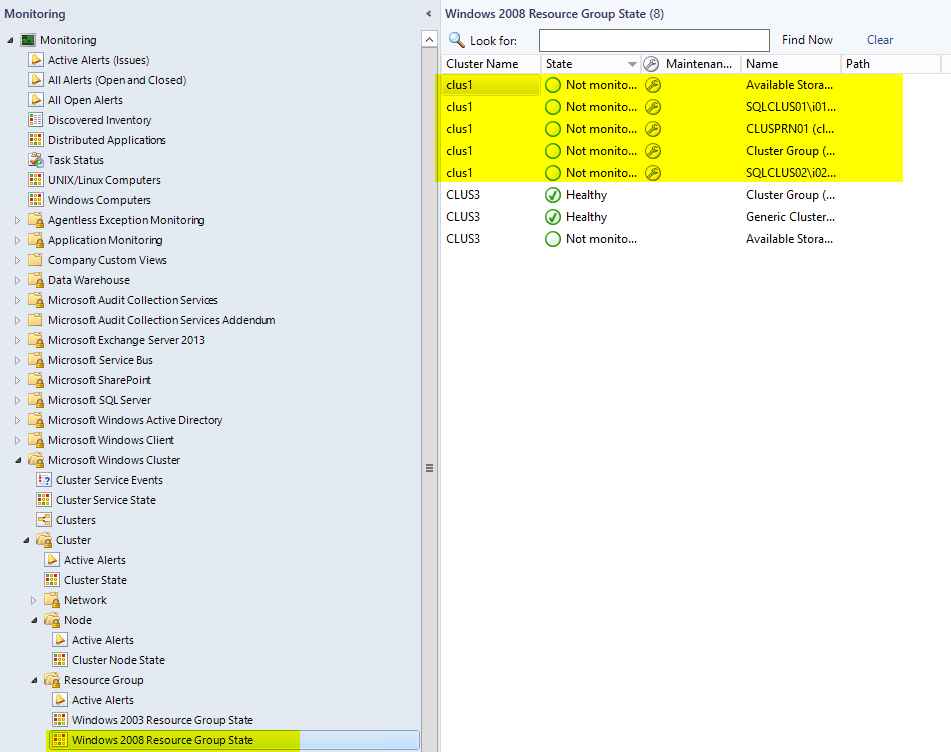
Resource Group State

State4

Continue Reading

SCOM Monitor Reset App

SCOMMonitorResetApp

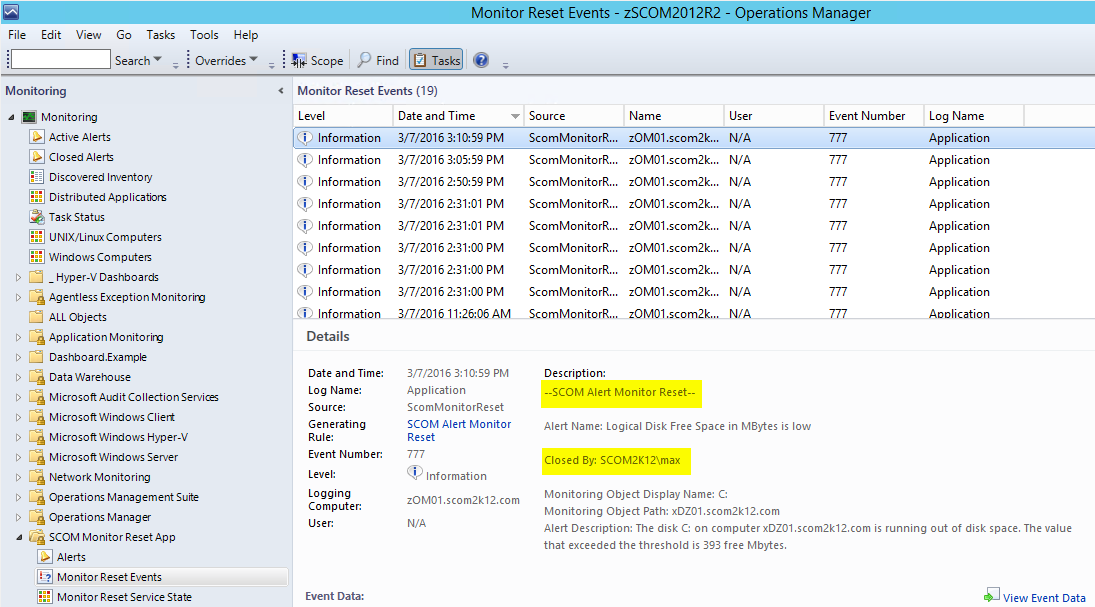
Users closing monitor based alerts creates chaos in a SCOM environment.  The SCOM Monitor Reset app keeps your alerts in sync.  Now users can close any alert and know that if the problem still exists they will get re-alerted automatically.


The SCOM Monitor Reset App is a scalable windows service that runs and resets any monitor based alerts closed by an end user.  You just install it and forget it.   The service takes care of all the work.

Service

Now as an SCOM administrator you no longer have to explain the difference between monitors and rules.  End users can close any and all alerts.  Closed alerts that are still a problem will re-open a new alert.

Download


Usage:

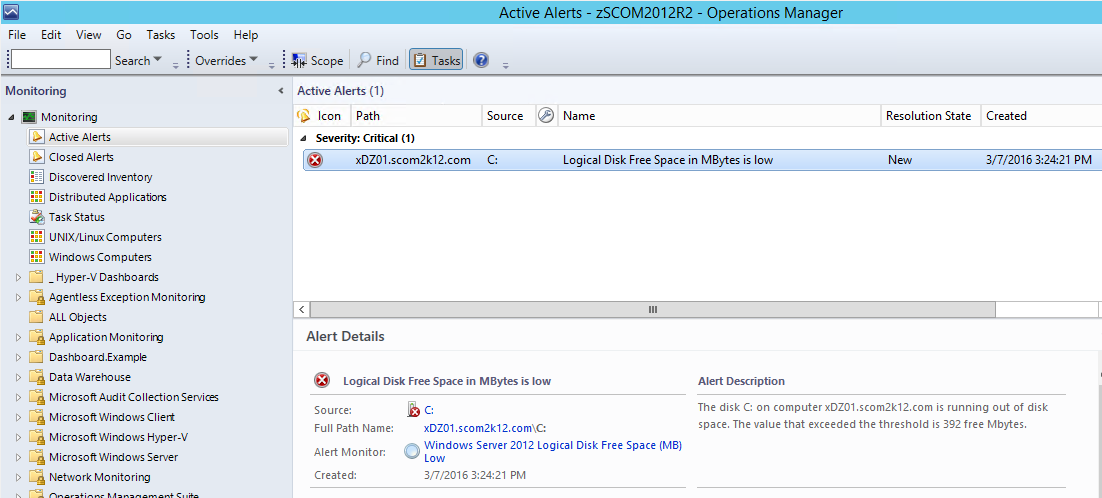
A disk space alert comes in.

Screenshot10


The user closes the alert without fixing the issue.
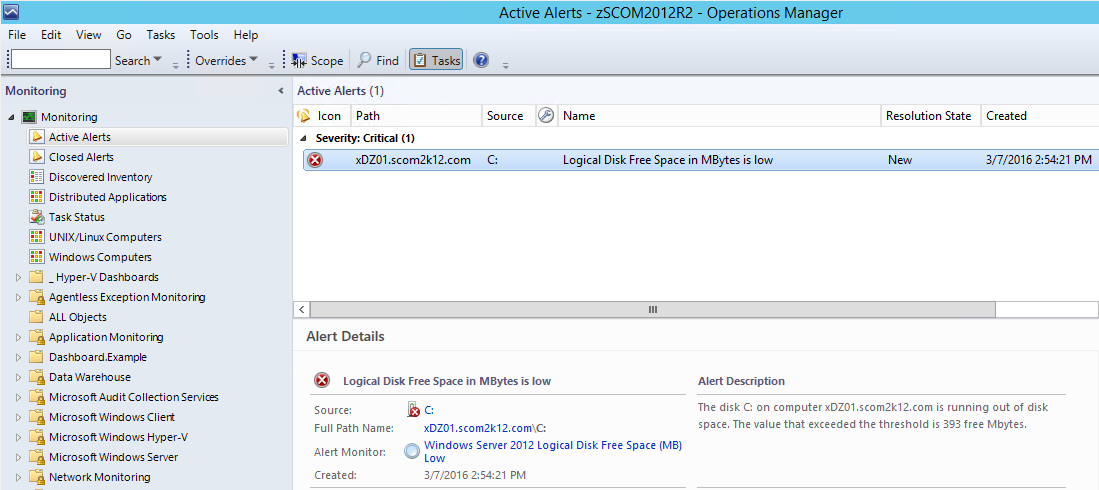
Normally the alert would stay closed and the monitor would remain in a critical state.

Bad

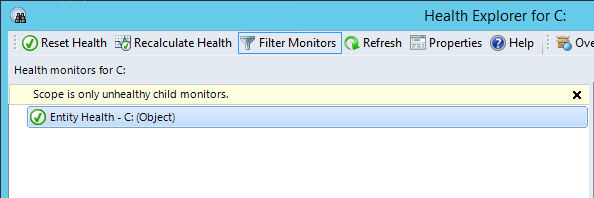
But with the monitor reset app.  After 5 minutes the alert is detected closed.  The monitor state is reset.

Screenshot11


Good

If disk space issue still exists a new alert will be created.


Fixed


Any problems, bugs, or issues please e-mail:  support@scom2k7.com.com

Continue Reading

Crazy DB Performance Collection rules in the SQL MPs

One of my customers was experiencing lots of growth in their OperationsManager DB.

They monitor hundreds of SQL servers. I had a look into their Top Tables using Kevin Holman’s Large table query. http://bit.ly/1REx9Os

Things looked pretty normal where Performance tables are the top tables

Table2


I drilled down a little further in the performance data and see this.

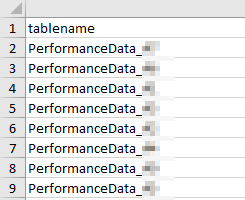
Tables


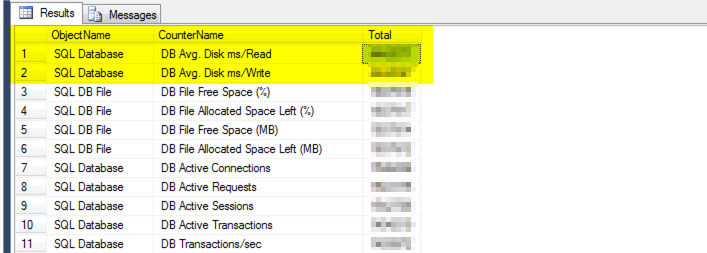
Focusing on the two top counters that are 4x larger then the next few.

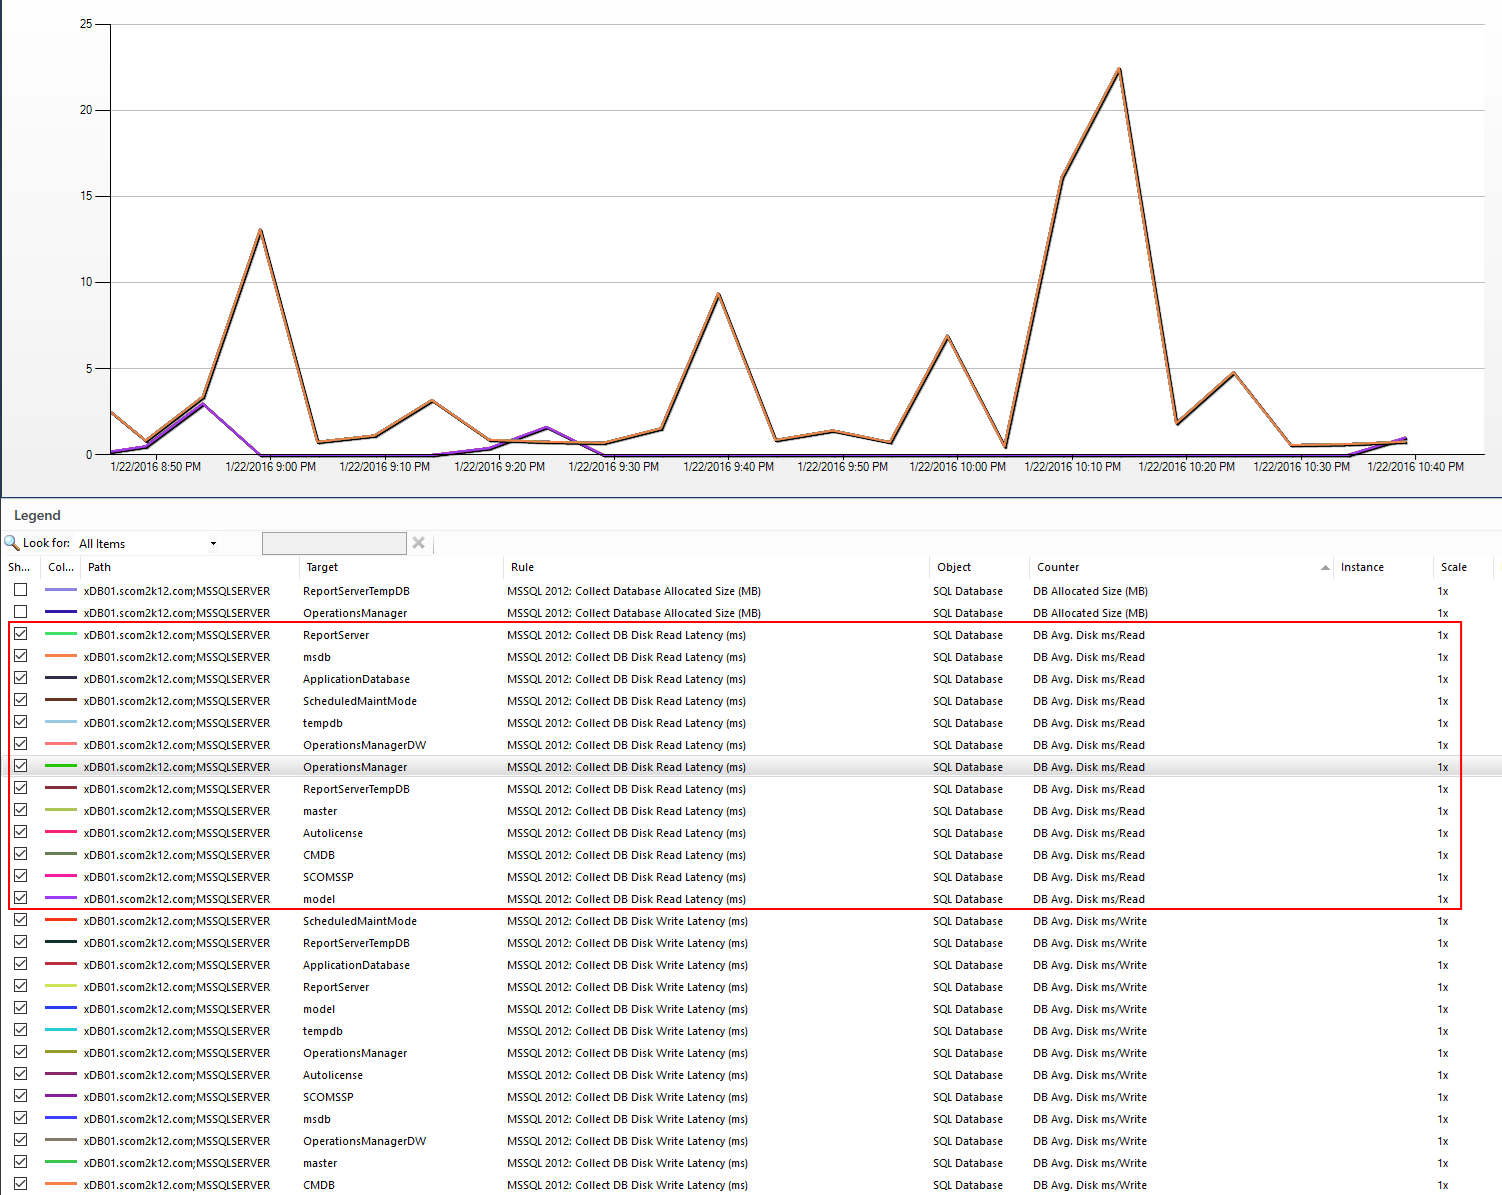
I took a look at the counters for one of my SQL servers and realize that we are collecting the same counter over and over for each database instance on a SQL server.

Perfmon


This is crazy.  It might make some sense if a customer ran every database on a individual drive, but that is not the norm.  Most SQL servers have one or a few drives for their DB files and Logs.

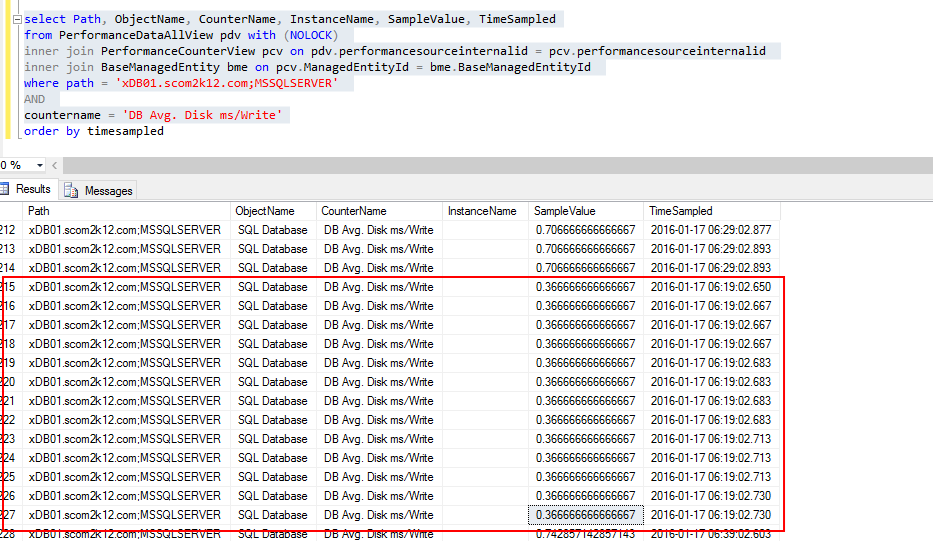
To double check I looked at the OperationsManager database performance tables.

dbData

Sure enough we are collecting the same data 13 times in my case.

So how do we fix this?  Disable the rule that collects this data using an override for SQL 2005, 2008, 2012, and 2014.

Rule for SQL 2012 is called

  • MSSQL 2012: Collect DB Disk Write Latency (ms)
  • MSSQL 2012: Collect DB Disk Read Latency (ms)

Latench


disable


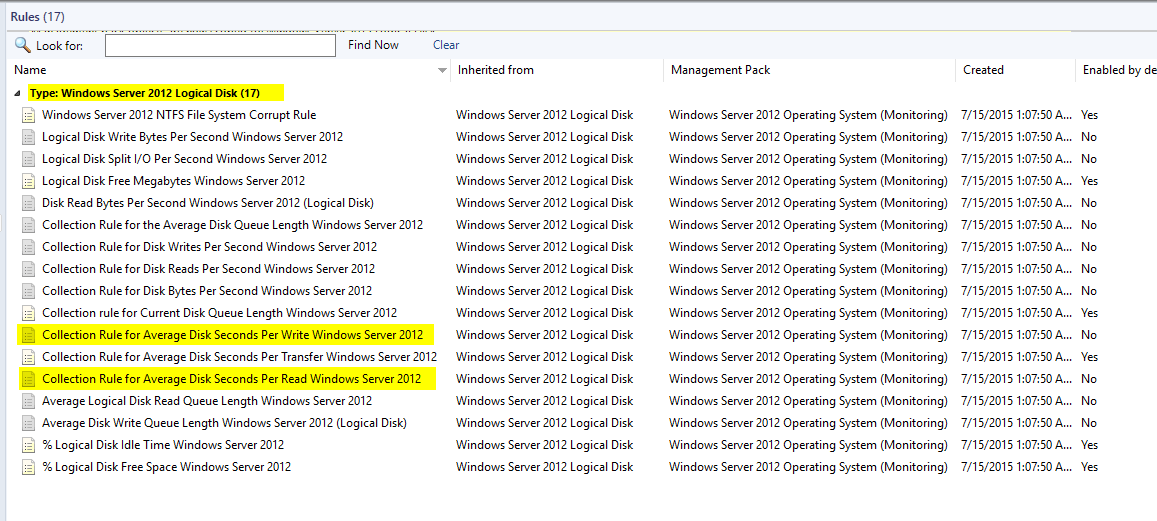
I then recommend collecting this data if you need it once per disk.

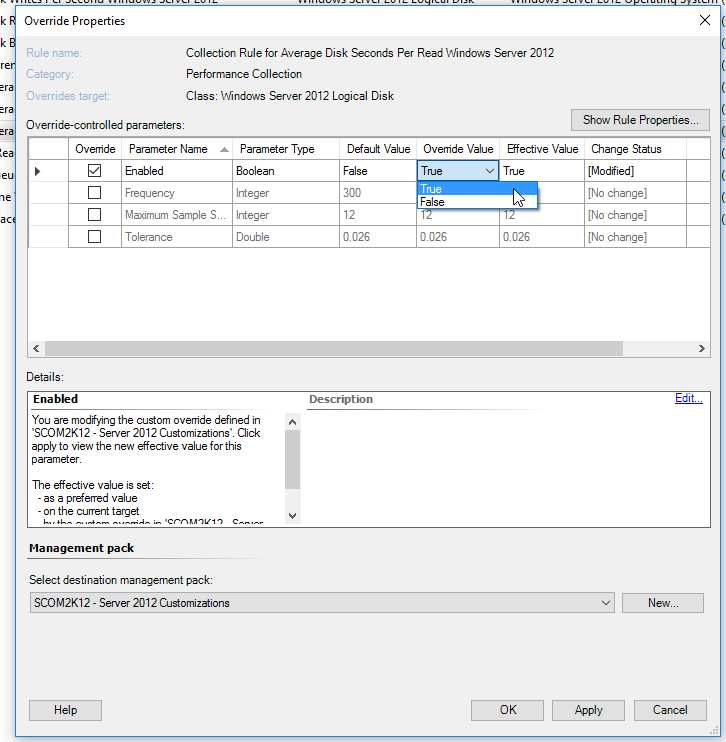
To enable it, create an override for Windows Server 2008 and 2012 Logical Disk

  • Collection Rule for Average Disk Seconds Per Write Windows Server 2012
  • Collection Rule for Average Disk Seconds Per Read Windows Server 2012

LogicalDisk


LogicalDiskTrue

Override True


Continue Reading