This process is extremely complicated and not well documented, so I’m going to detail each step here to help guide you through it.
1) Preparation
Install two Windows Server 2019 VMs (Note: Windows Server 2022 isn’t compatible as a Replication Server) and join them to the domain.
VM1: AzMigrate1
VM2: AzReplicate1 – Allocate at least 700GB of drive space for replication.
Create a Resource Group called Migration-RG in Azure.
2) Create the Azure Migrate Project
Go to the Azure Migrate blade in the Azure portal.

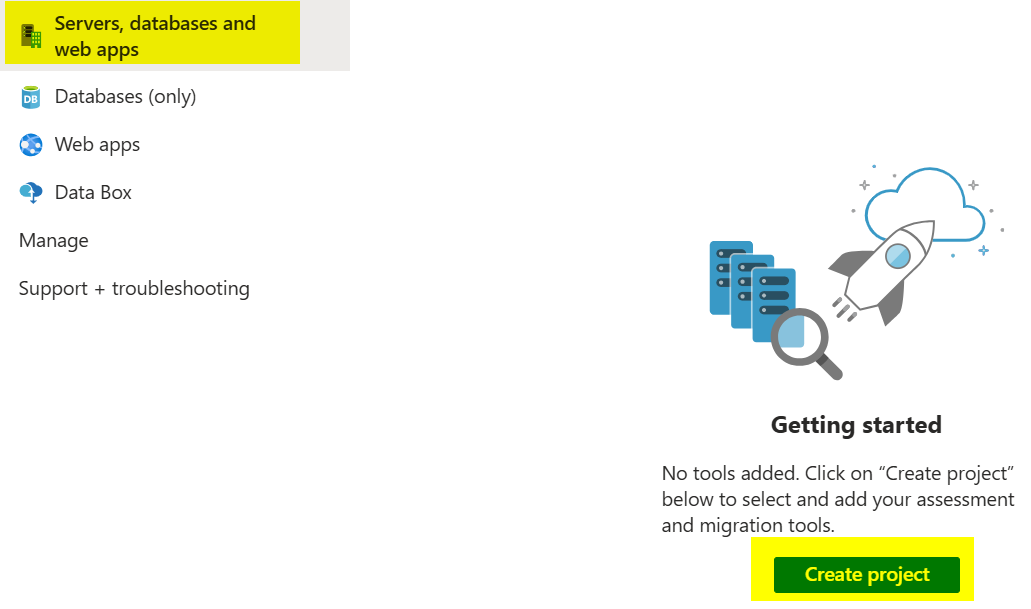
On the left-hand side, select Servers, databases and web apps, then click Create project.
Select the Migration-RG resource group.
Give the project a name, for example MigrateProject.
Select a location, for example United States.
Click Advanced, choose Private endpoint for the connectivity method, and set Disable public network access to Yes.
Select your subscription, virtual network, and subnet.

Click Create.
3) Set Up the Azure Migrate Appliance
In Azure Migrate, click Servers, databases, and web apps again.
Click Discover, then select Using appliance.

Under “Are your servers virtualized?” choose Physical or other.
Under “Generate project key,” give your appliance a name (e.g. MigrateApp), then click Generate Key.

Log in to the AzMigrate1 server using RDP.
Download the Azure Migrate Appliance. Copy and extract it to the AzMigrate1 server.

Copy the project key and save it to a text file on AzMigrate1.

Important: Ensure your on-premises server can communicate with Azure Private DNS.
You will need conditional forwarders set up for these Private DNS zones:
privatelink.blob.core.windows.net
privatelink.prod.migration.windowsazure.com
privatelink.siterecovery.windowsazure.com
privatelink.vaultcore.azure.net
If your local DNS can’t communicate with Azure Private DNS directly, you may need a DNS server in Azure or a Private DNS resolver. With a private DNS resolver, you can set conditional forwarders there.

Here is how I have my private resolver set up:

If Private DNS isn’t working, you could use an LM hosts file on AzMigrate1, but it’s not recommended.
To get host files if you don’t have Private DNS working:
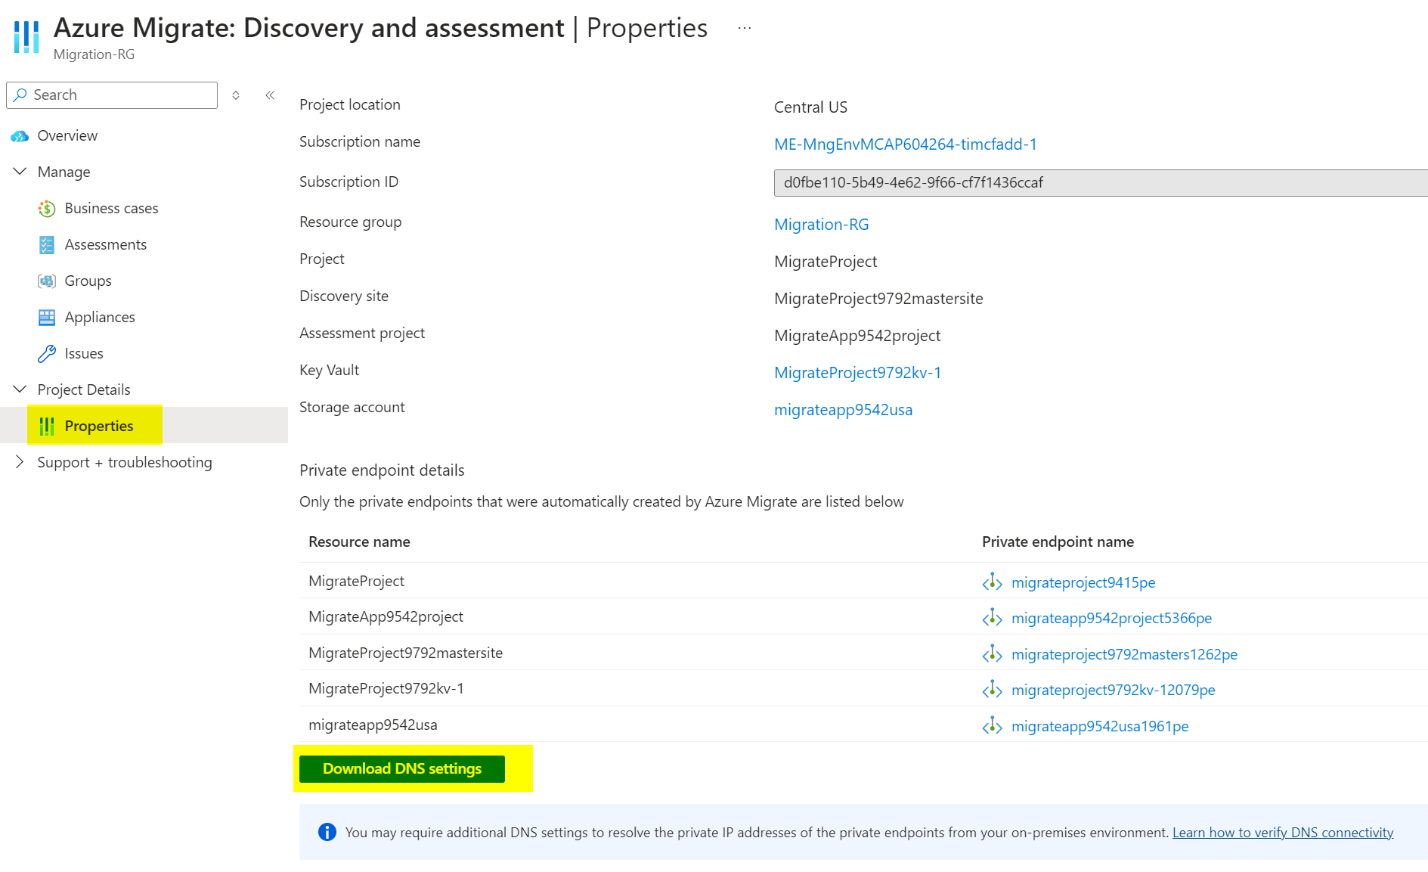
Go to the Azure Migrate project and click Overview. Under Project Details, click Properties, then select Download DNS Settings.

If you’re using a hub-and-spoke network, ensure that each private DNS zone has a virtual network link to your hub network with the site-to-site VPN. Otherwise, DNS queries won’t resolve privately.
We can verify private DNS is working by running an NSlookup from AzMigrate1 against one of the private DNS records:

Once verified, proceed with the Azure Migrate Appliance installation.
On AzMigrate1, open PowerShell and navigate to the directory where the appliance files were extracted. Run:
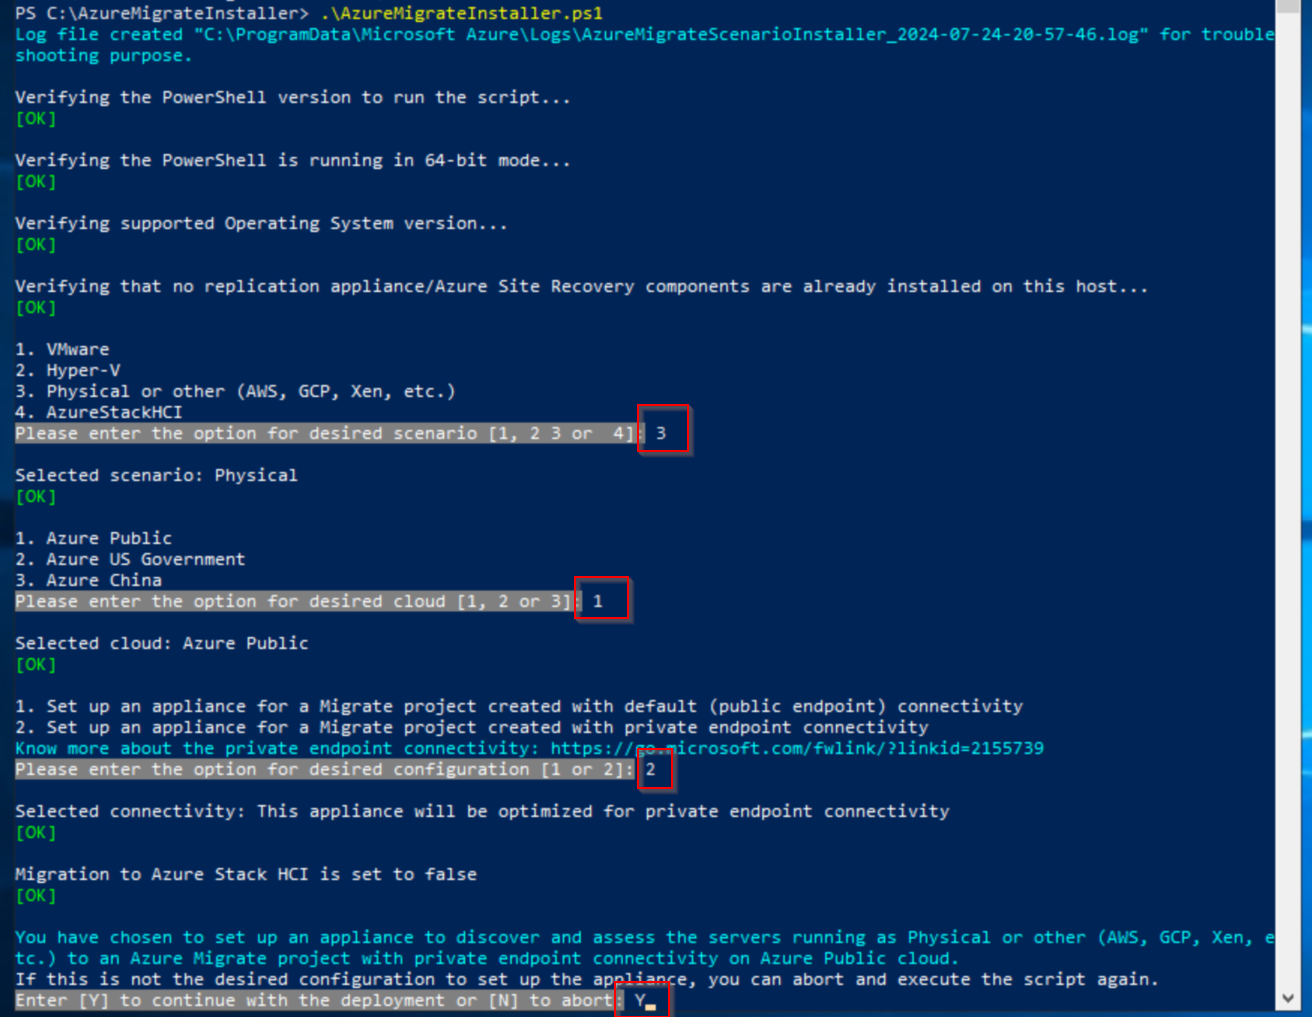
.\AzureMigrateInstaller.ps1

Select 3 for Physical, 1 for Azure Public, and 2 for Private Endpoint connectivity. Press Y to continue.
When asked to install Microsoft Edge, select Y. If it fails, download it manually from this link. Choose to remove IE as prompted.
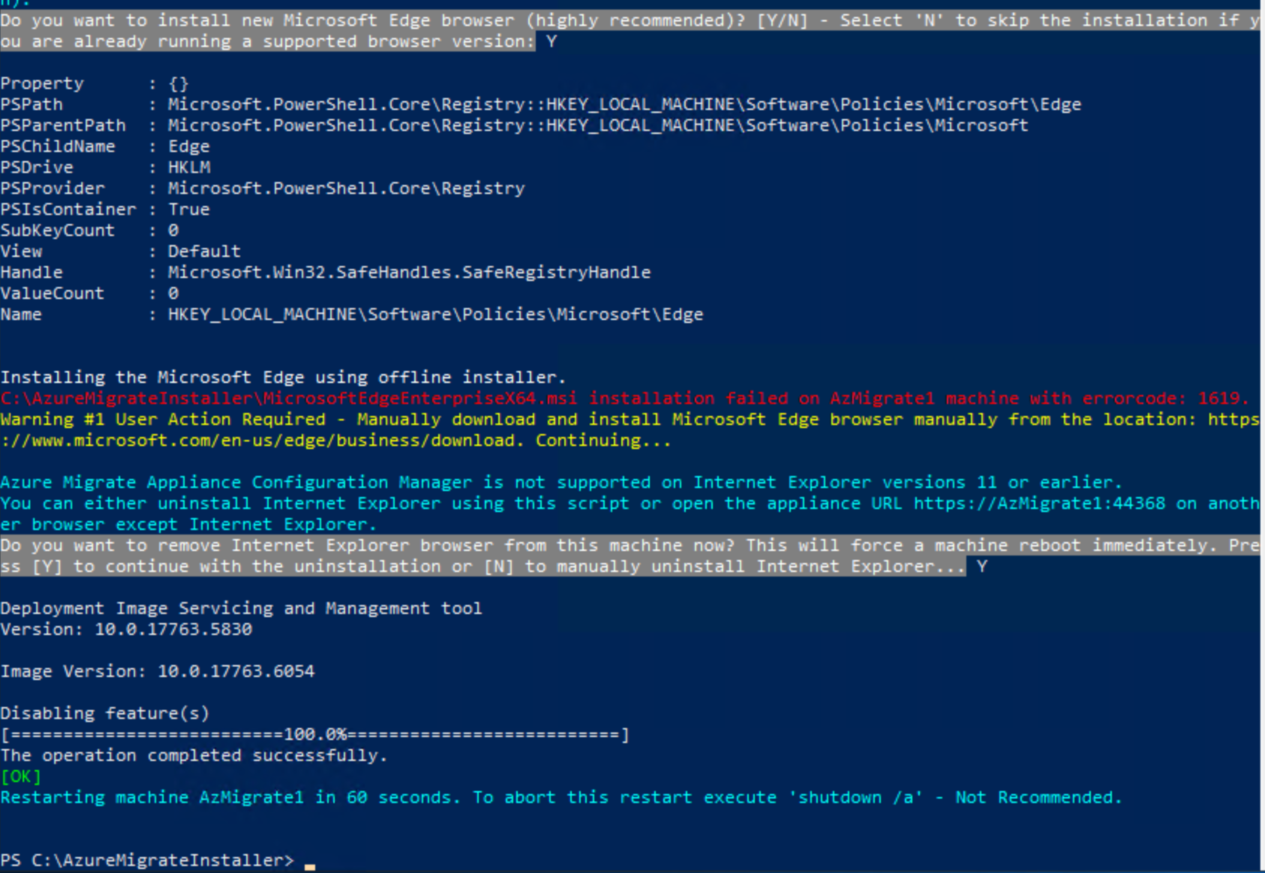
After the server reboots, log back in and install Microsoft Edge if it wasn’t automatically installed.
4) Configure the Azure Migrate Appliance
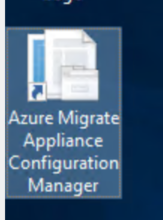
Launch Azure Migrate Appliance Configuration Manager on the desktop of AzMigrate1.
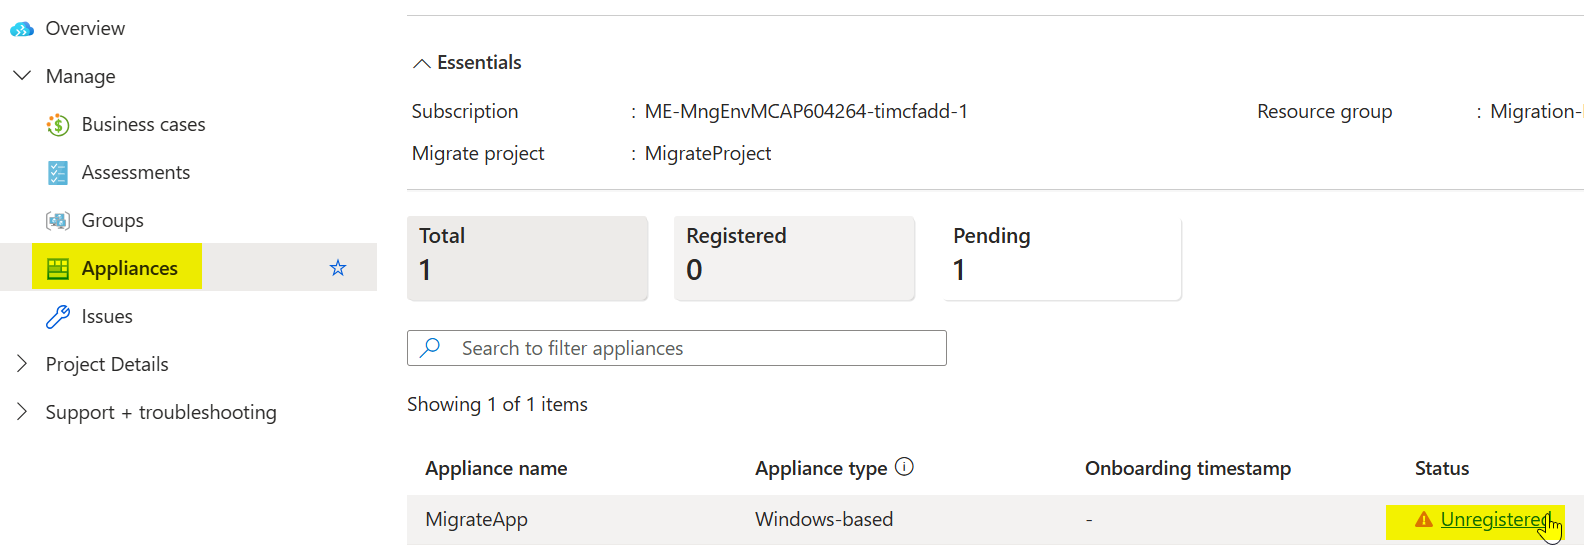
Use the project key you saved earlier. If lost, go back to the Azure Migrate project, click Overview, then Manage Appliances, and find the Unregistered appliance to get the key again.

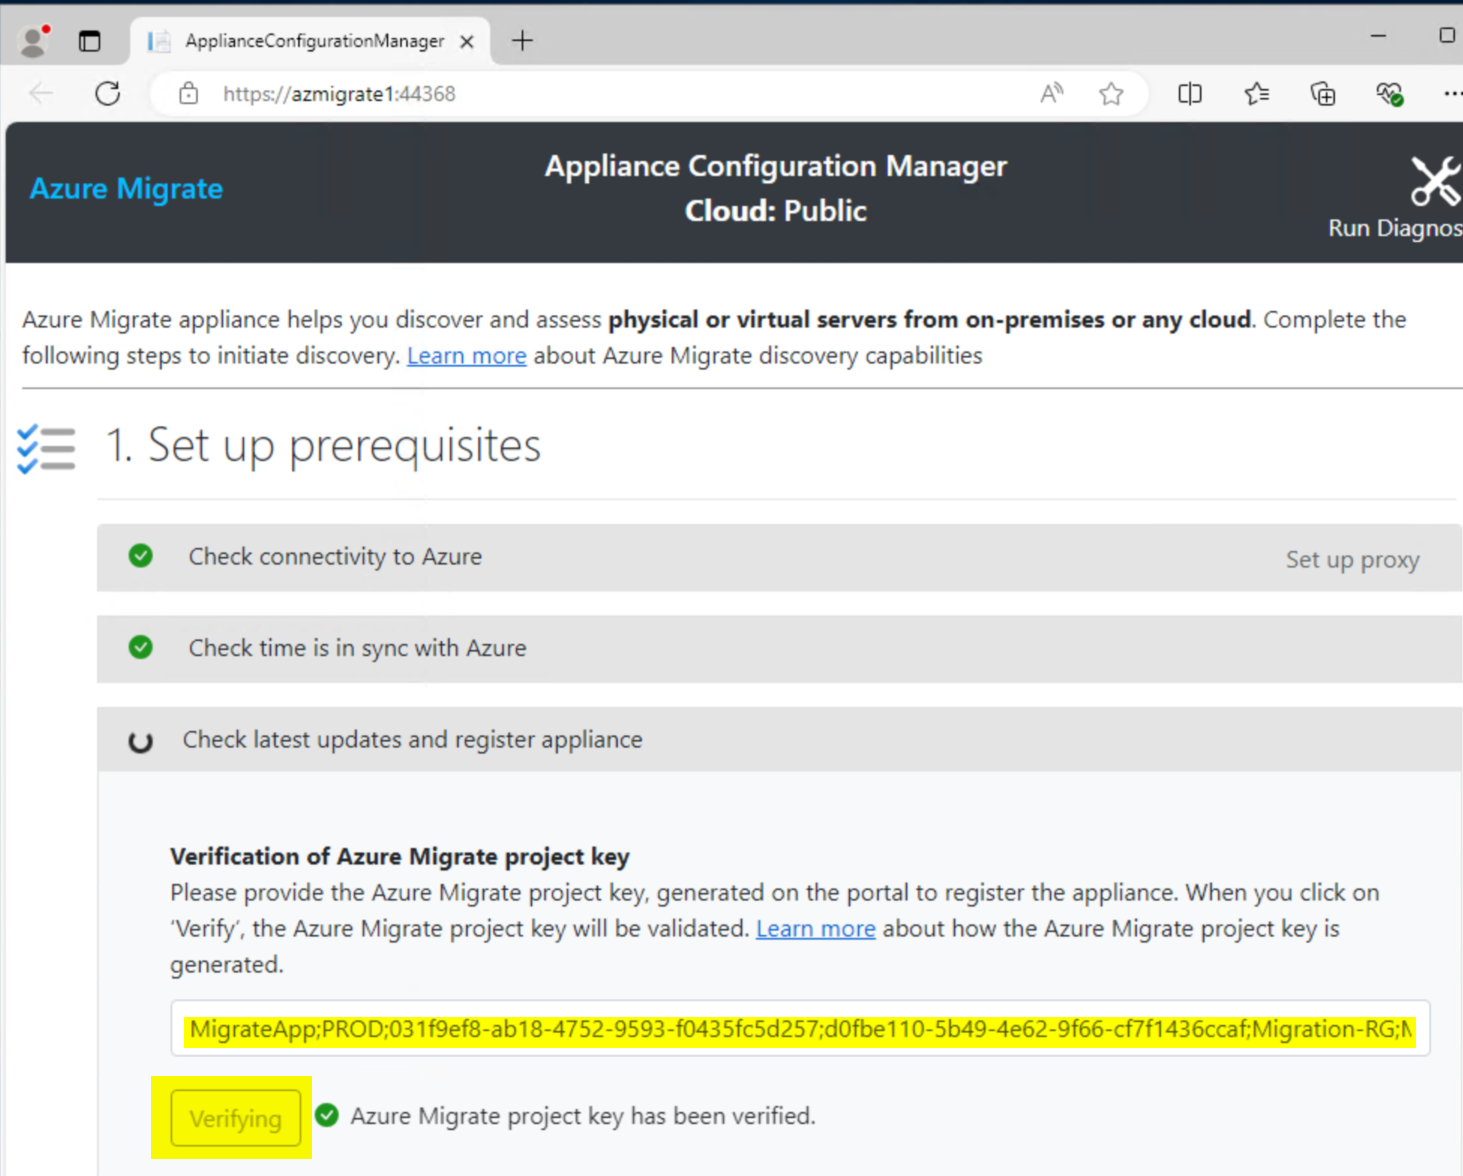
Paste the key and click Verify. After verification, click Login. Click Copy code & Login, then sign in with an account that has rights to access the Migrate project and resources. You should see a success message stating the appliance is registered.

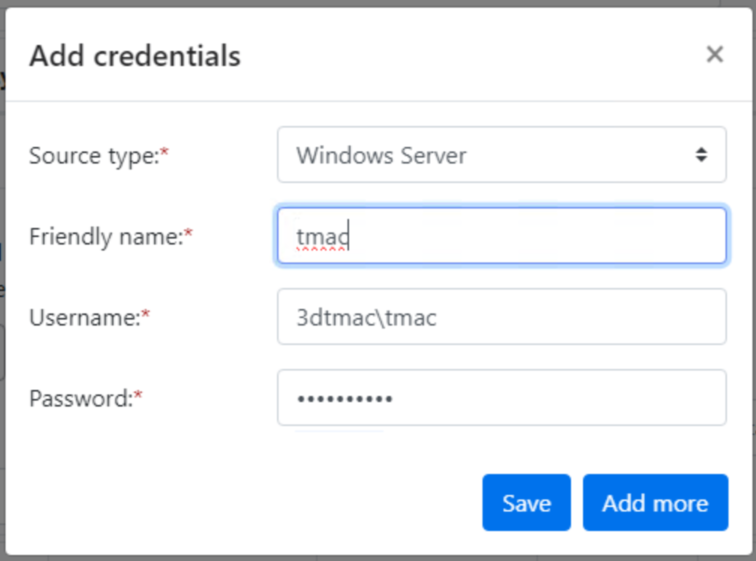
Add credentials for an admin user that can run discovery (use domain\username format).
Click Add Discovery Source. Enter the FQDN of the server(s) you want to migrate. You can list multiple servers.
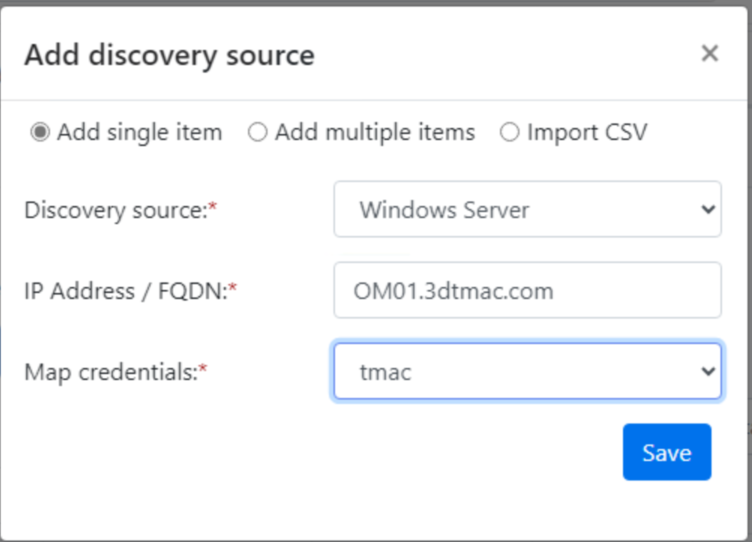
For software inventory and dependency analysis: It’s recommended to add credentials here as well. Even though you added them before, this step ensures inventory runs properly. You can specify application-specific credentials if needed.
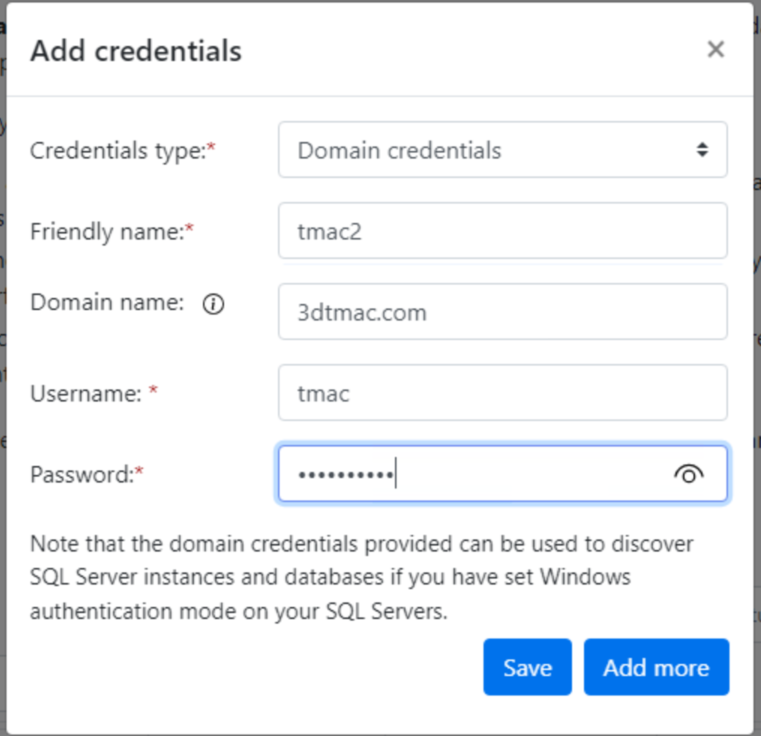
Click Start Discovery. After discovery completes, go back to the Azure portal and refresh the Azure Migrate project page.

Click Discovered Servers to see the discovered servers. You can run an assessment if desired for VM size recommendations, though it’s not required for migration.
5) Set Up the Replication Server
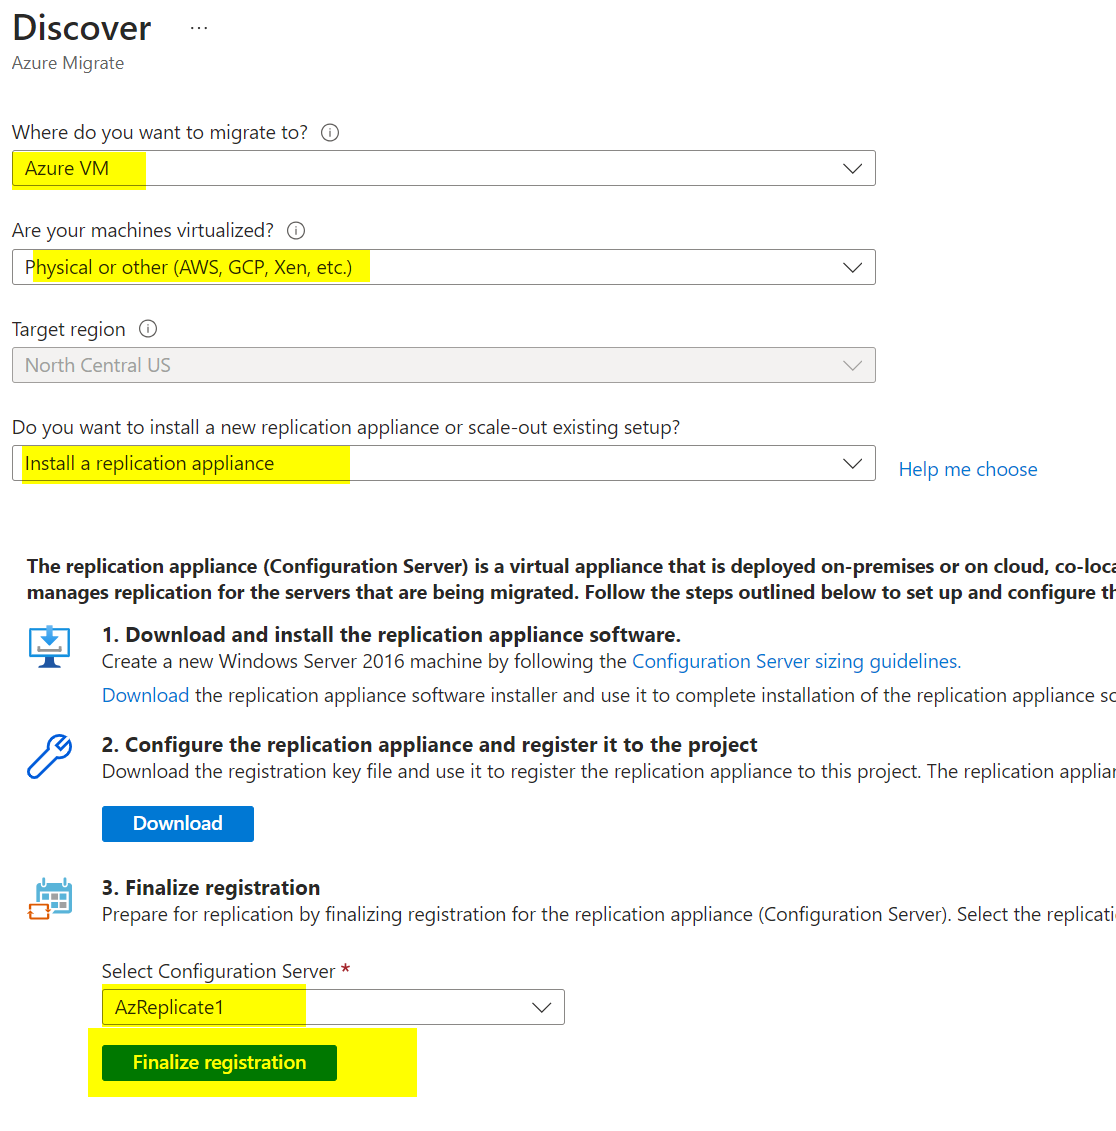
Under Migration and Modernization, click Discover.
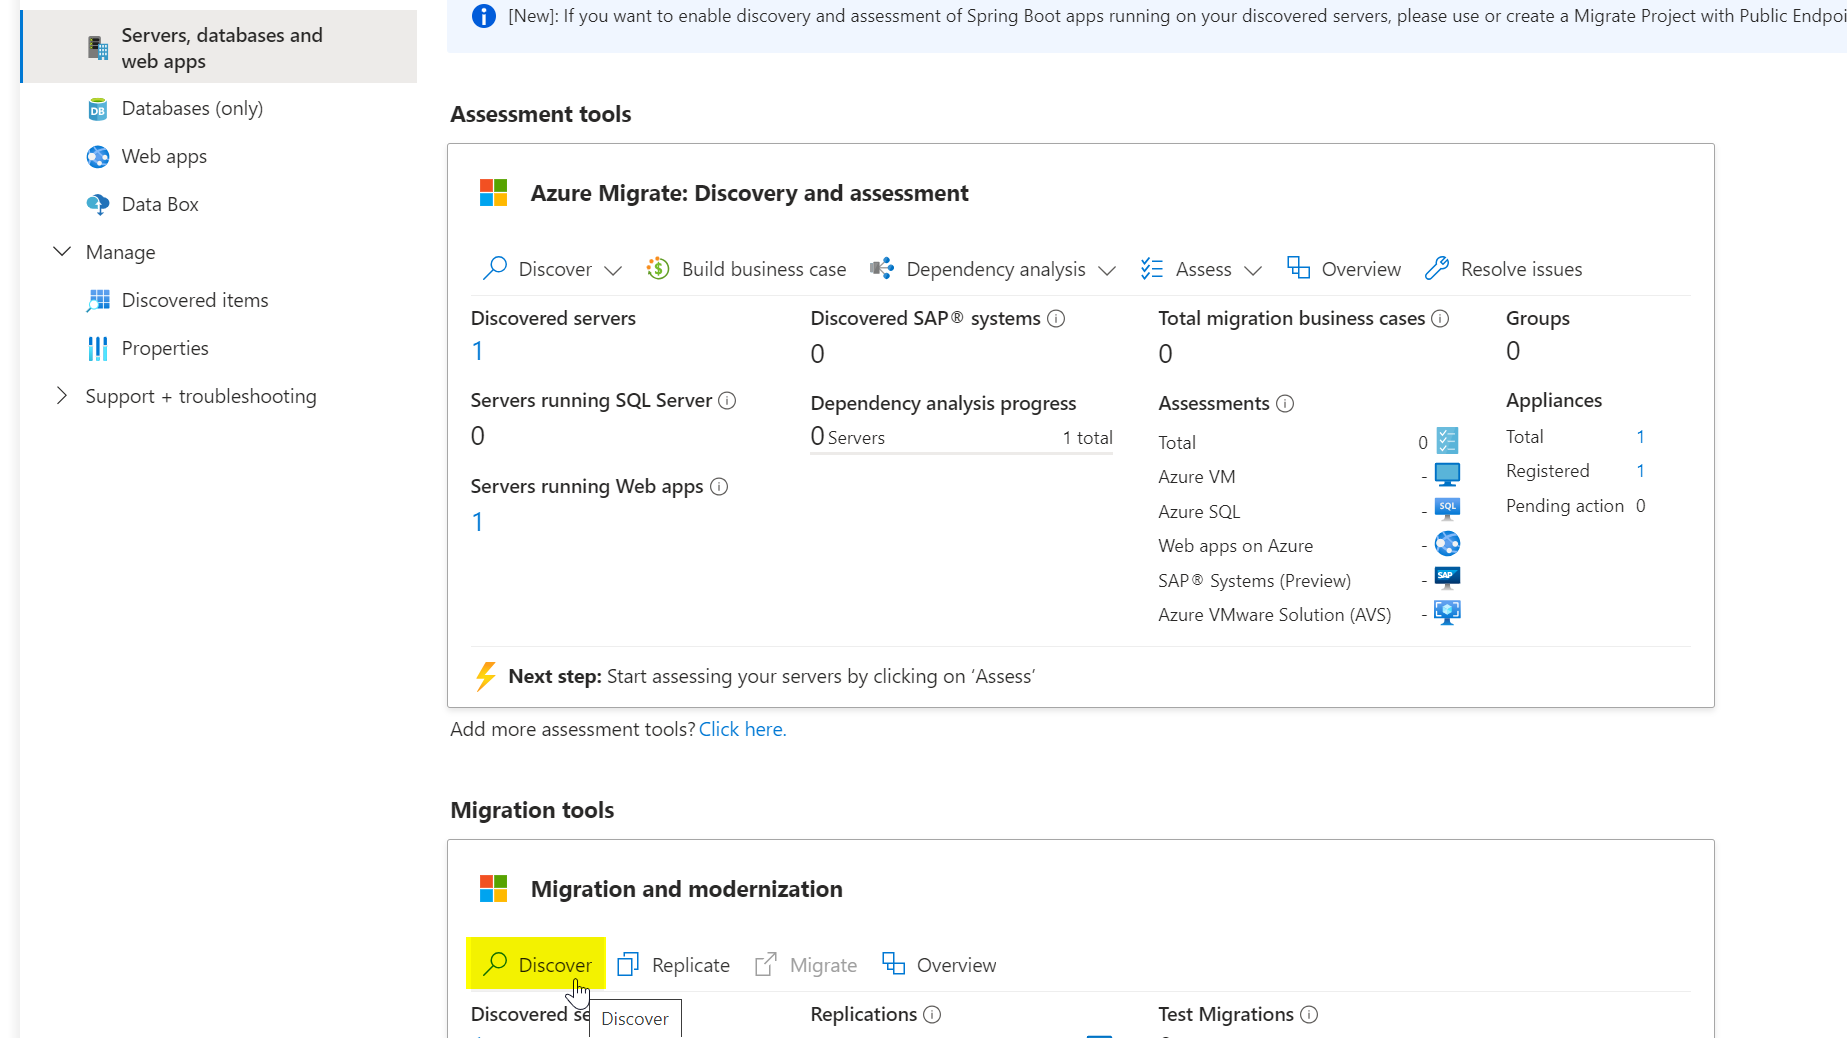
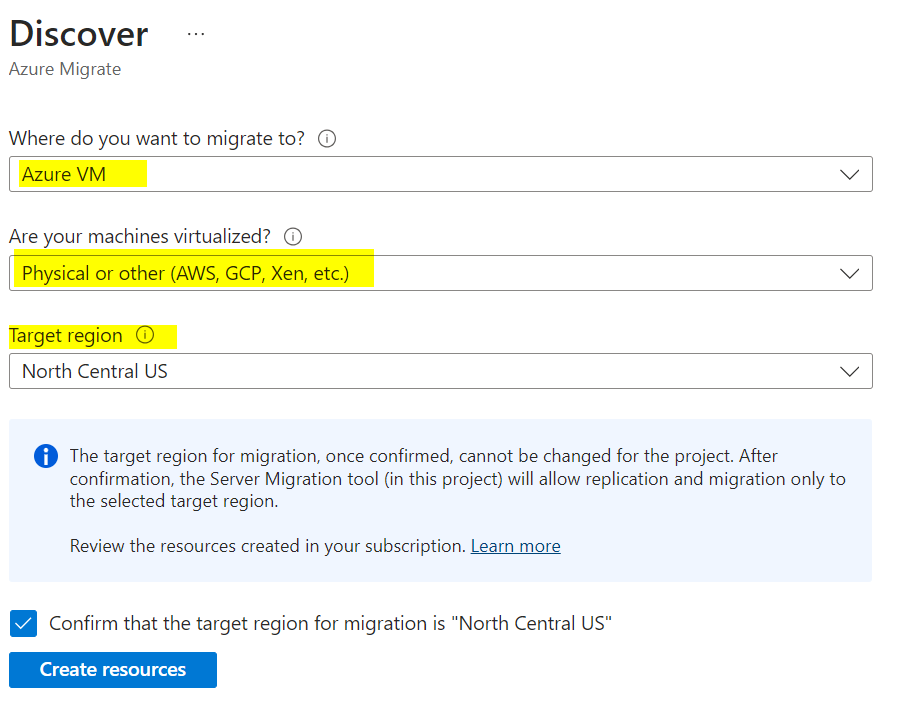
Choose Azure VM as the target.
For virtualization, select Physical or other.
Select the target region where you plan to migrate the VMs. Be sure to pick the correct region, as you can’t change it later for this migrate project.
Choose Install a replication appliance. Download both the replication appliance and the registration key file.

Copy them to AzReplicate1.
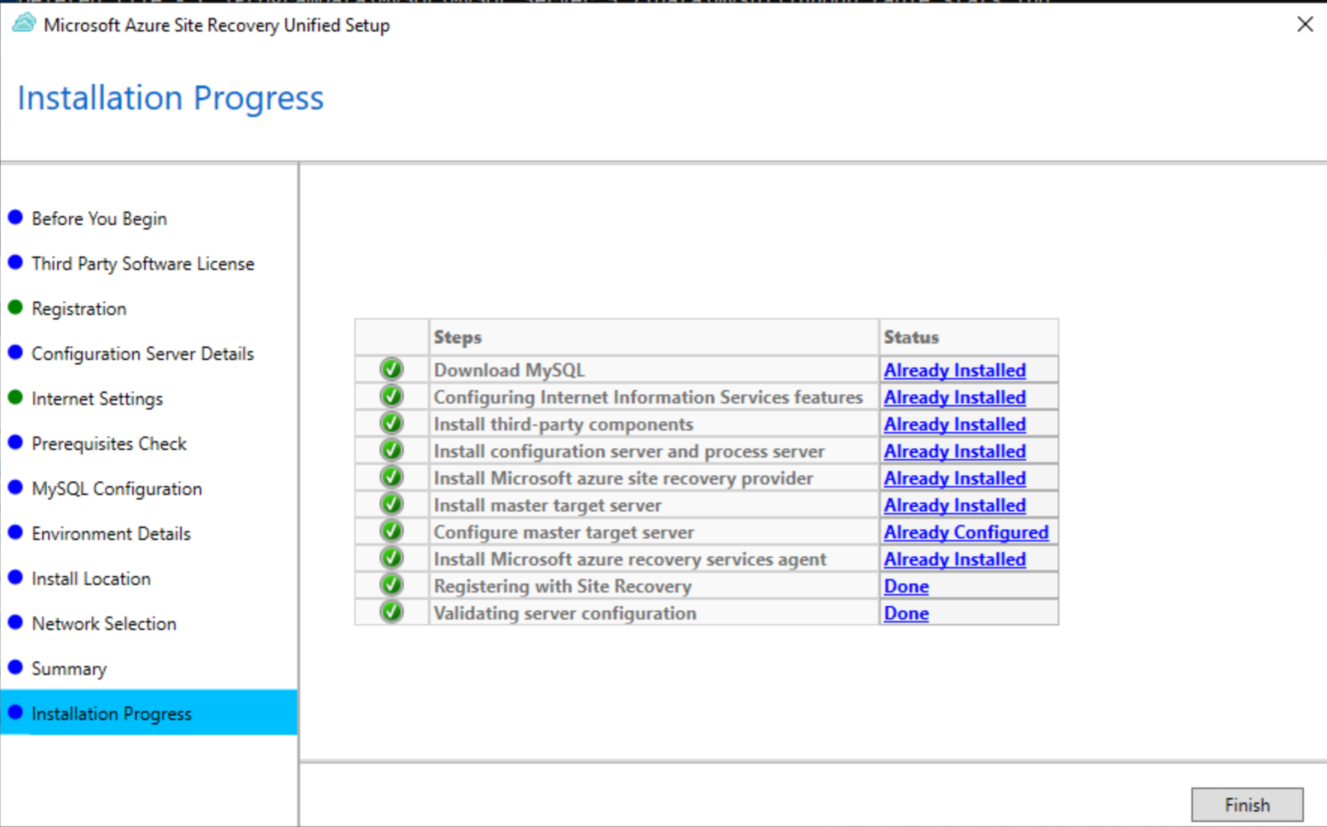
Launch MicrosoftAzureSiteRecoveryUnifiedSetup on AzReplicate1.
Leave the default option: Install the configuration server and process server.
You’ll need MySQL Community Server. Download it beforehand because the installer may fail to install MySQL when using private endpoints.
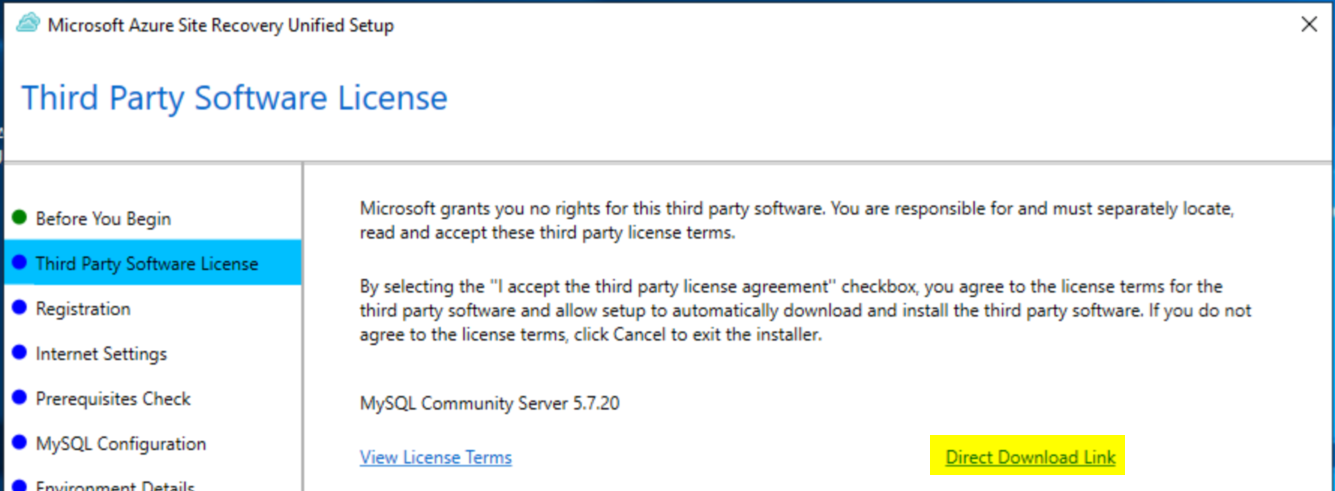

Download MySQL from: MySQL Installer
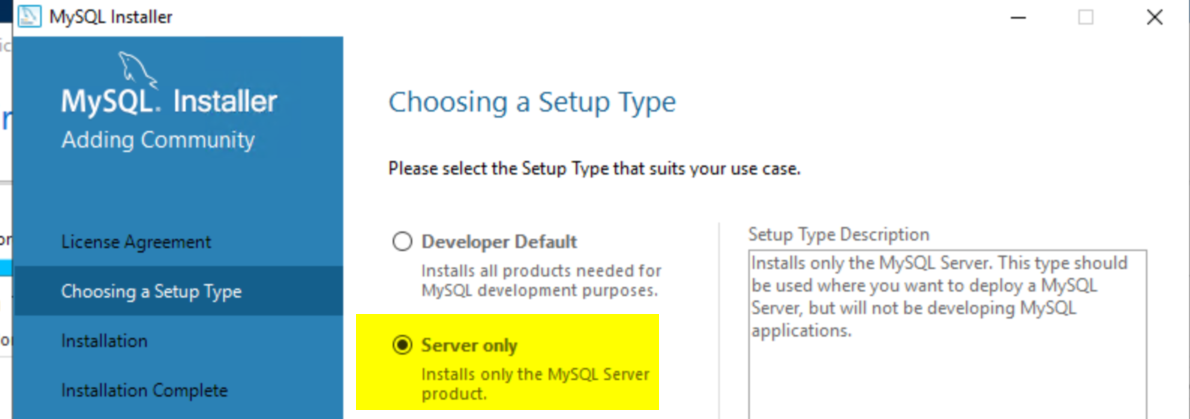
Install MySQL (Server Only). You may need Microsoft Visual C++ 2013 Redistributable (both 32-bit and 64-bit) due to a MySQL bug. Install both, then proceed with MySQL installation.
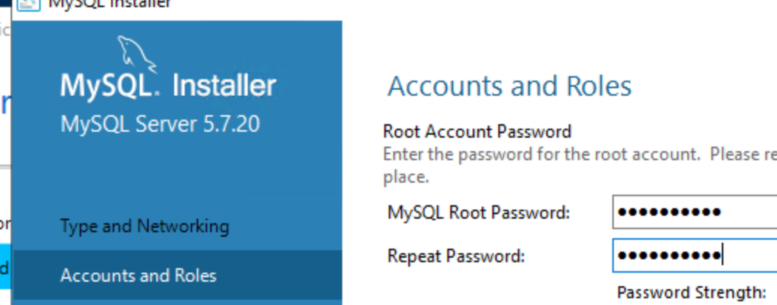
Use a password for MySQL—this will be needed by the Azure Replication Server installer.
Finish the MySQL configuration and return to the Azure Site Recovery Unified Setup wizard. Provide the key file (.VaultCredentials) you downloaded earlier and proceed with the setup.

Run prerequisite checks, enter the MySQL password, and when prompted, select No for environment details.
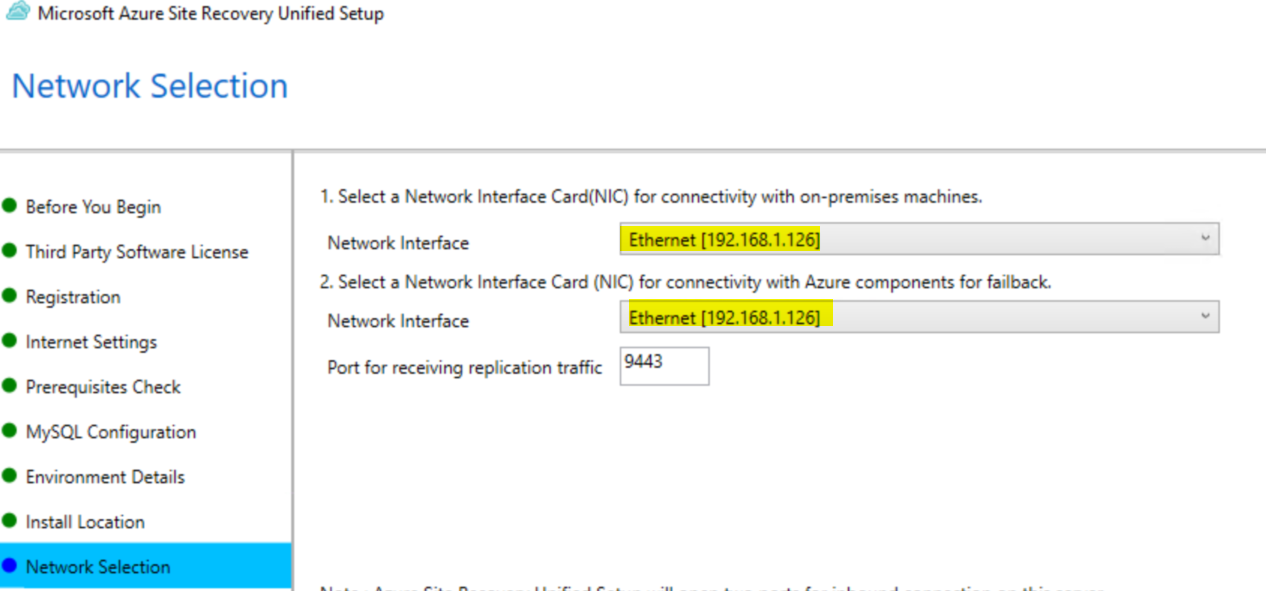
Select network interfaces as needed and click Next.
Before installation, you may need to run some commands to fix MySQL permissions or remove leftover data if the setup fails. Stop MySQL, delete the data directory, and ensure no mysqld.exe processes are running. Reset permissions and clear temp files if necessary.
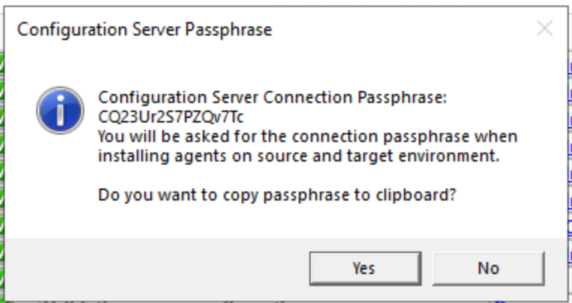
Save the configuration server passphrase to a file named passphrase.txt. You will need this later.
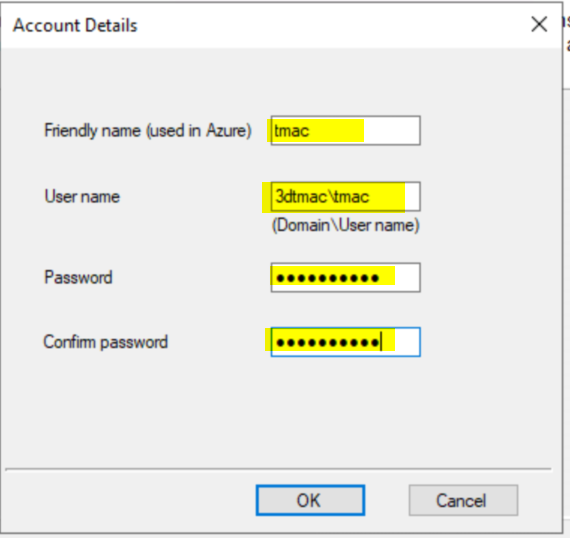
On the Microsoft Azure Site Recovery Configuration Server page, click Add Account to add the account and credentials used previously.
Go back to Azure Migrate, under Migration tools click Discover again. Make the same selections, but now select your configuration server and click Finalize registration.
You should see a success message. Click Close.
6) Install and Configure the Mobility Agent on the Source Server
On AzReplicate1, browse to C:\Program Files (x86)\Microsoft Azure Site Recovery\home\svsystems\pushinstallsvc\repository and find the Microsoft-ASR_UA_9.61.0.0_Windows_GA_18Mar2024_Release.exe file. Copy this to the server you want to replicate.
Follow the official instructions for installing the Mobility Service via command prompt: Microsoft Docs
Copy the installer to C:\Temp on the source server. Run:
cd C:\Temp
ren Microsoft-ASR_UA*Windows*release.exe MobilityServiceInstaller.exe
MobilityServiceInstaller.exe /q /x:C:\Temp\Extracted
cd C:\Temp\Extracted
UnifiedAgent.exe /Role "MS" /InstallLocation "C:\Program Files (x86)\Microsoft Azure Site Recovery" /Platform "VmWare" /Silent /CSType CSLegacy
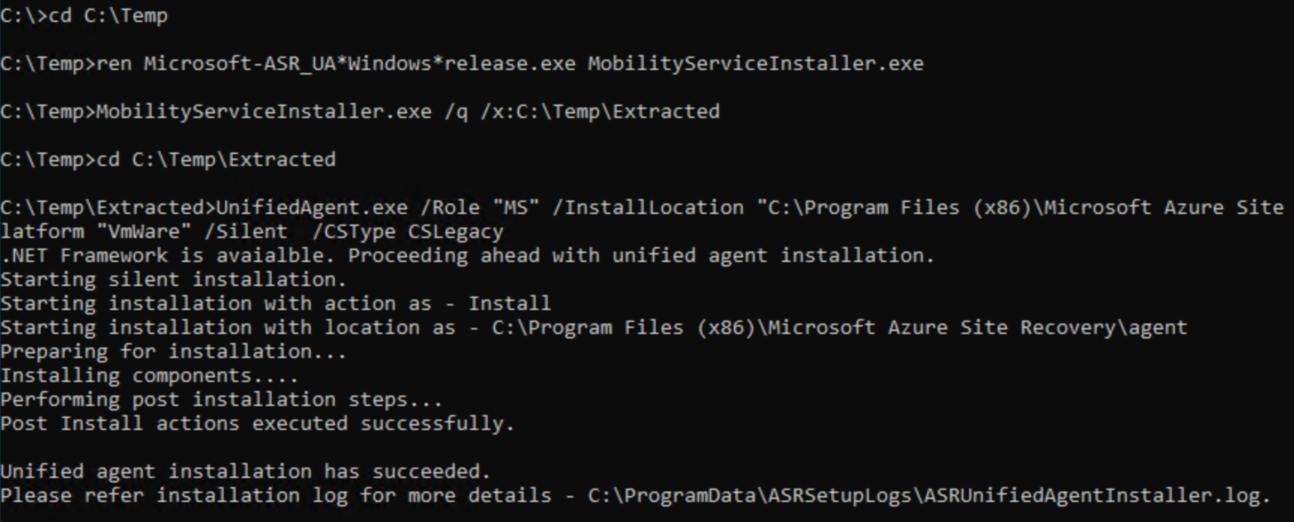
Use the passphrase you saved earlier. If you forgot it, run the following on AzReplicate1:
C:\ProgramData\ASR\home\svsystems\bin\genpassphrase.exe -v

Create passphrase.txt on the source server in C:\Temp\Extracted and paste the passphrase there.
Get the IP of AzReplicate1 and run:
cd "C:\Program Files (x86)\Microsoft Azure Site Recovery\agent"
UnifiedAgentConfigurator.exe /CSEndPoint

Wait 15-30 minutes for the registration to complete.
7) Create an Azure Storage Account for Replication
Create an Azure Storage account in the same region you selected for replication.
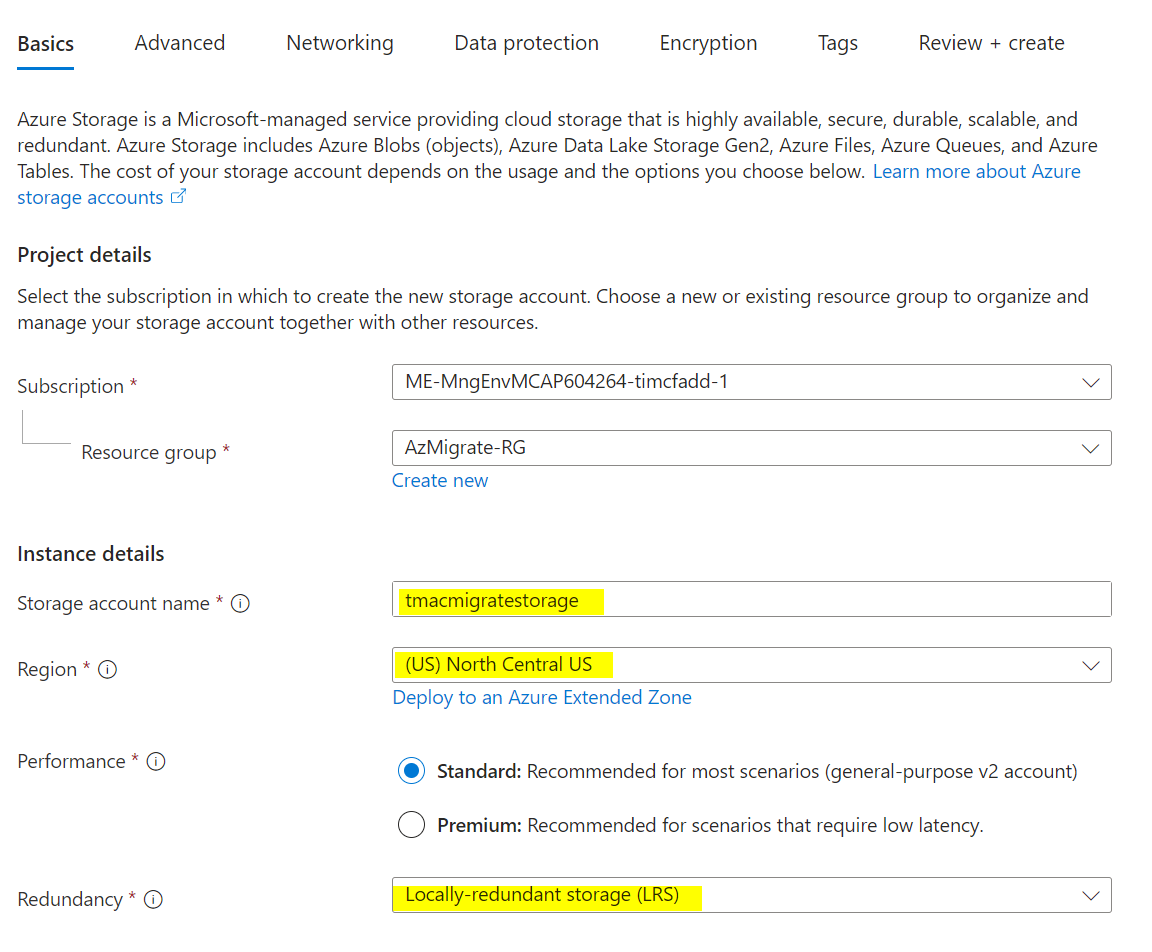
Under Networking, enable public access from selected virtual networks and IP addresses as needed. Under Data Protection, uncheck all backup and replication options. Leave other defaults and create the storage account.
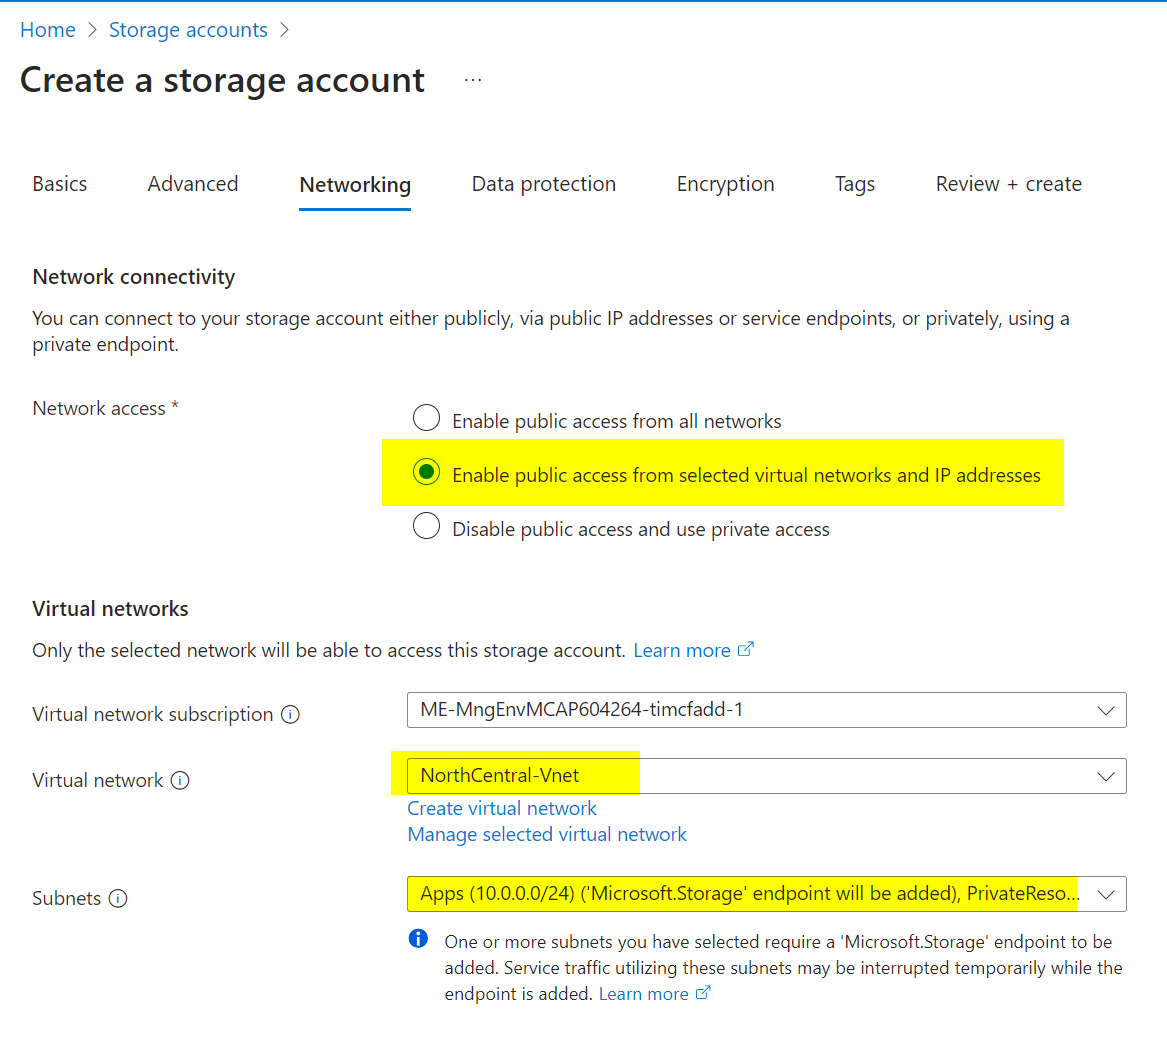
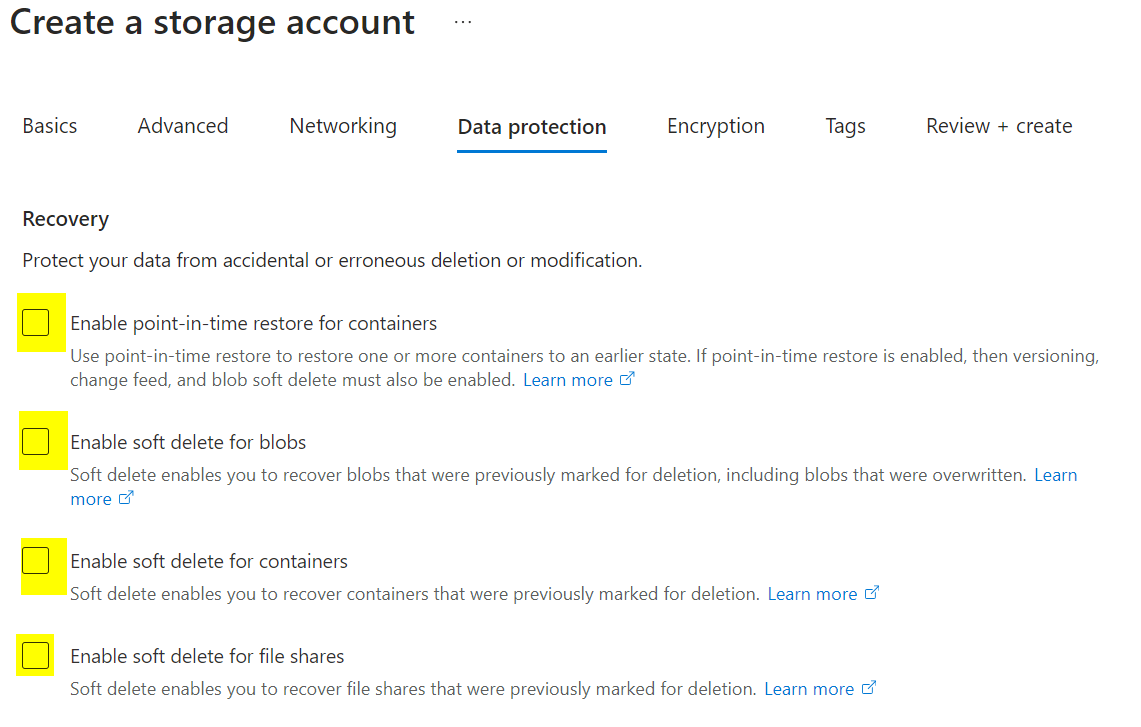
Follow the Microsoft documentation for required permissions. Assign Contributor and Storage Blob Data Contributor roles to the Managed Identity for the vault and migrate project at the storage account level.

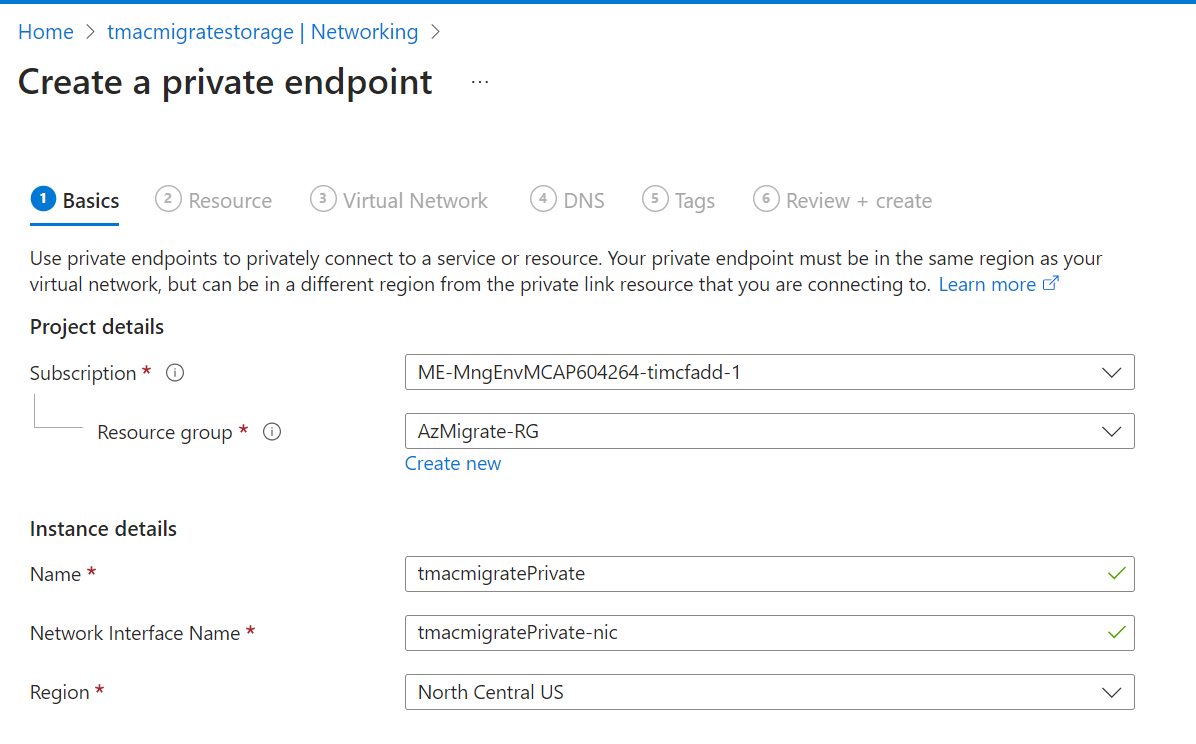
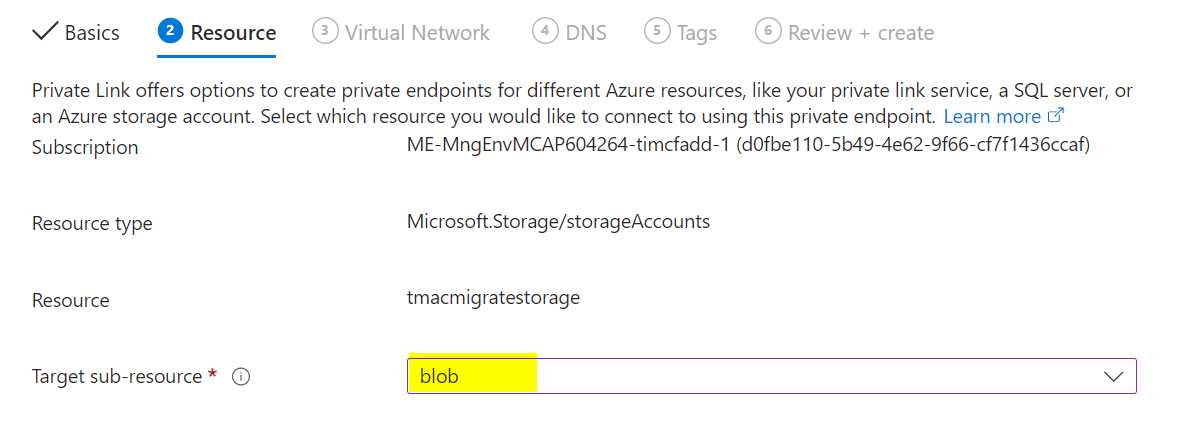
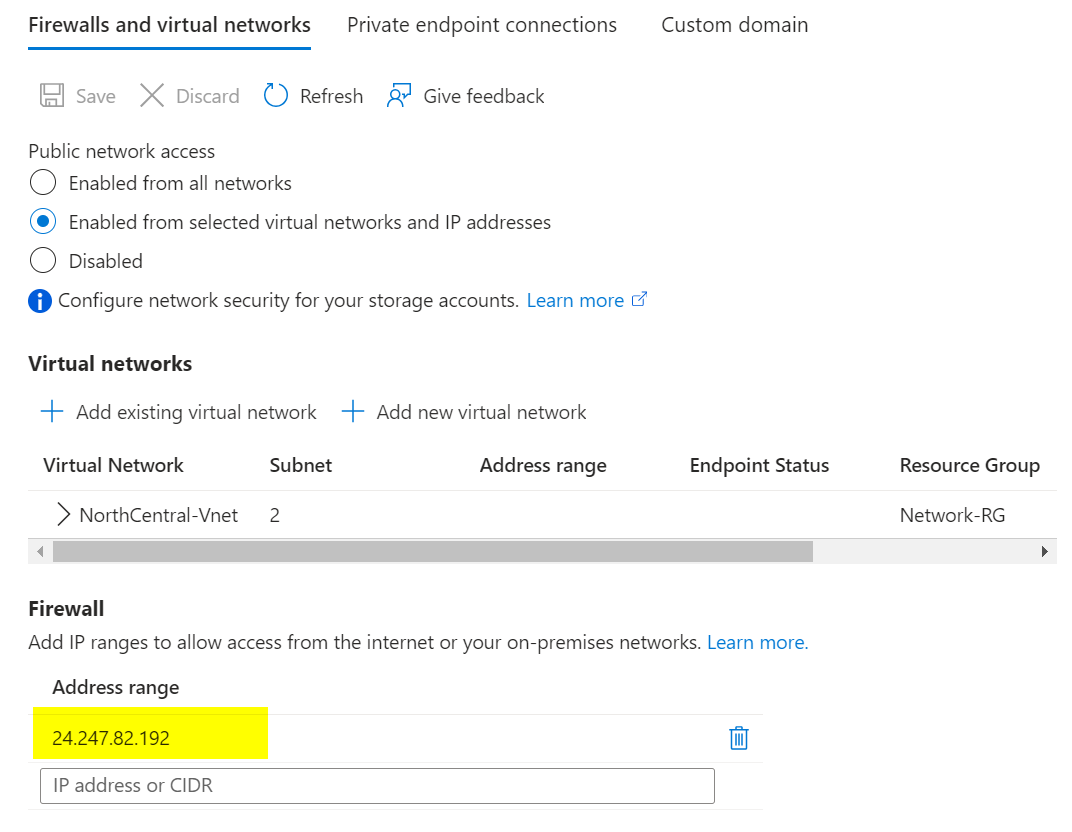
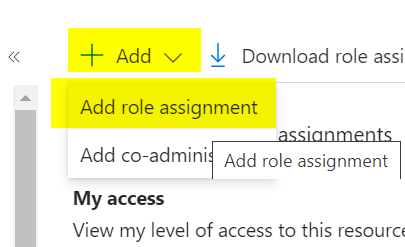
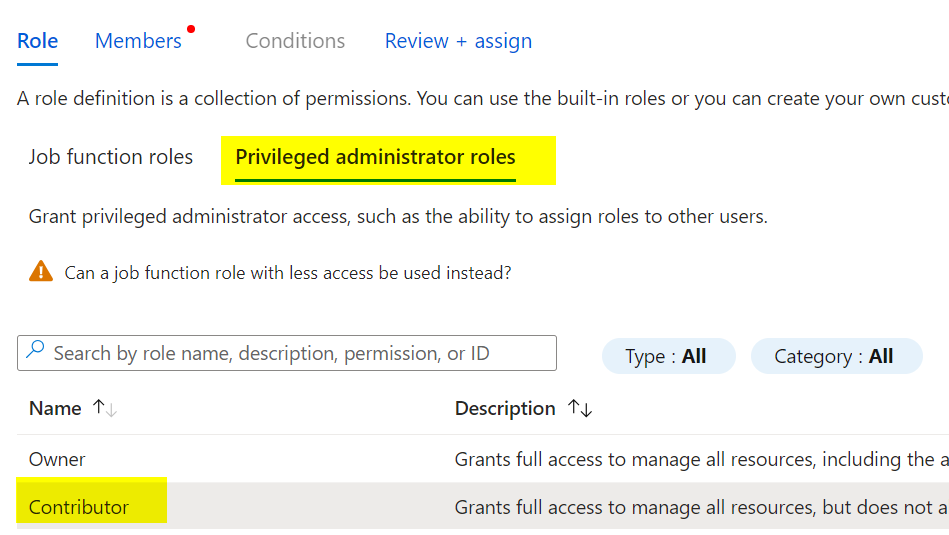
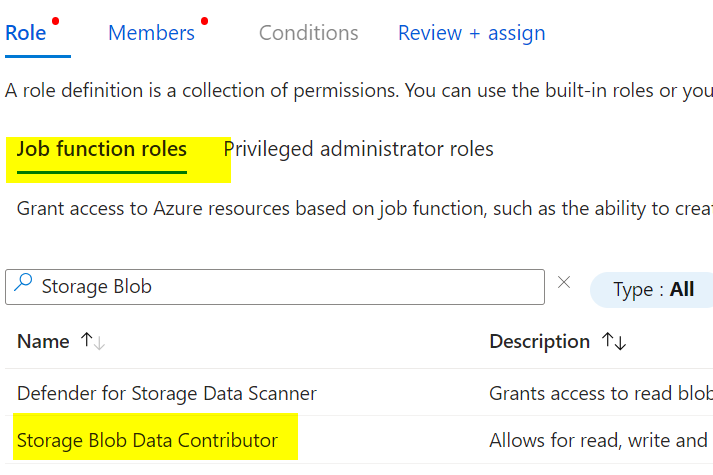
8) Start Replication
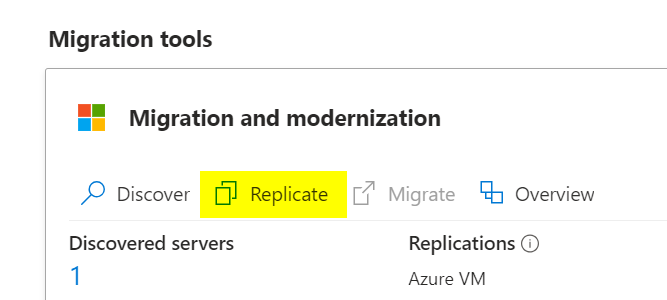
Return to the Migrate project and select Replicate. Choose Physical or other as the source, and select the region, storage account, and network you configured.
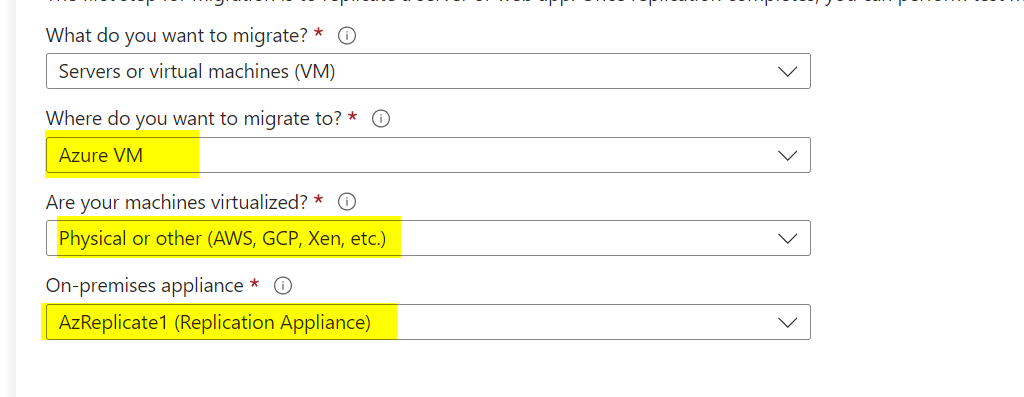
Under “Virtual Machines,” select “No, I’ll specify” and choose the servers you discovered earlier. Set the VM size, disk type, and other settings as needed.
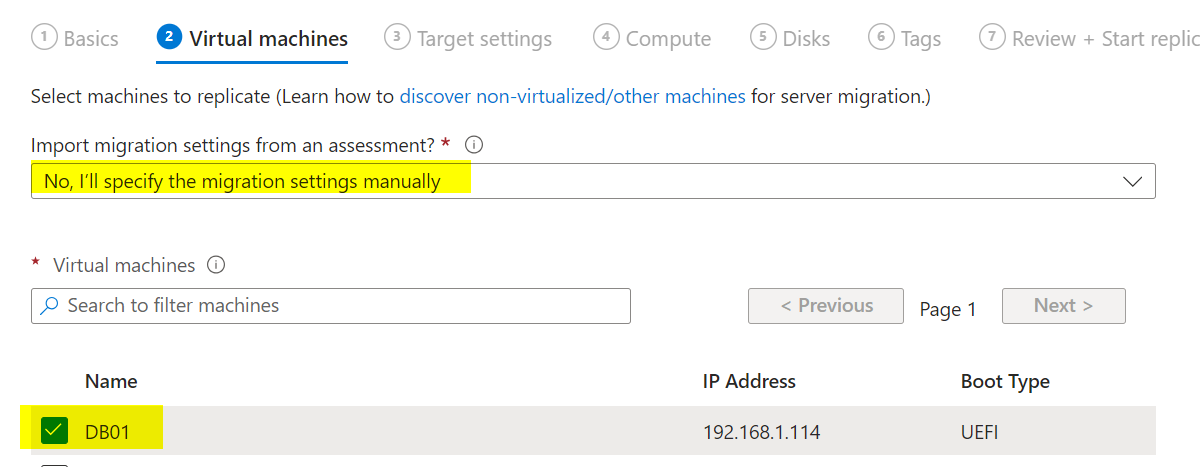
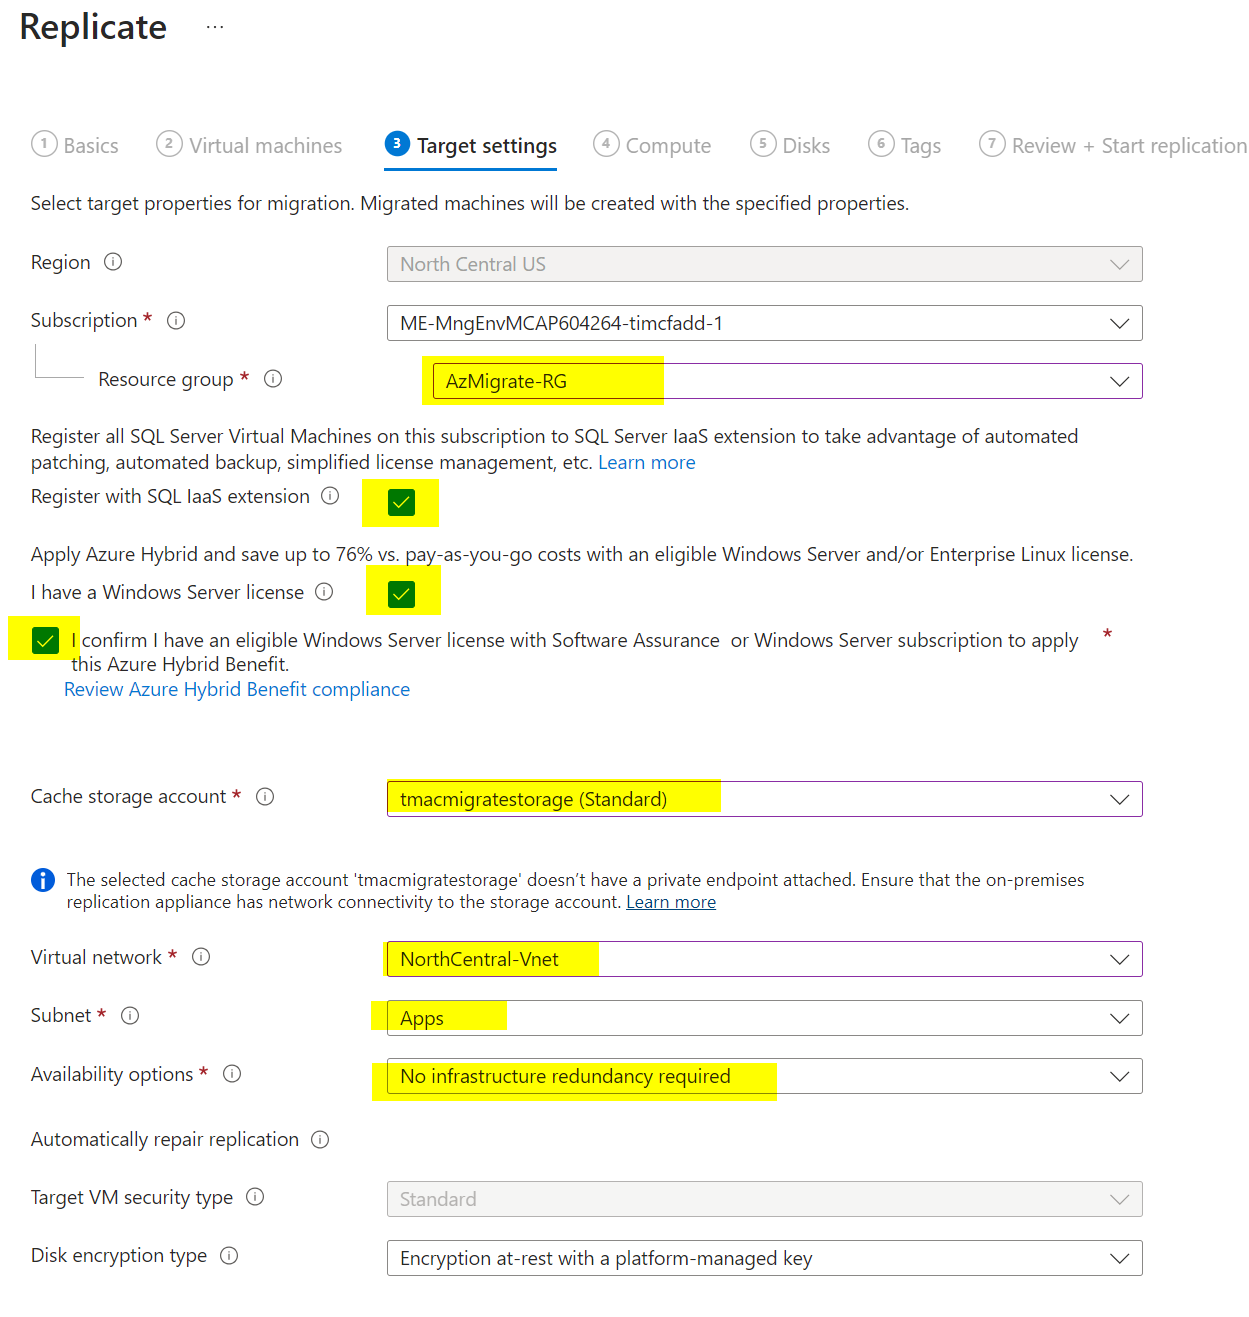


Click Start Replication. Once replication starts, you can monitor its status in the portal. It may take several hours to complete.

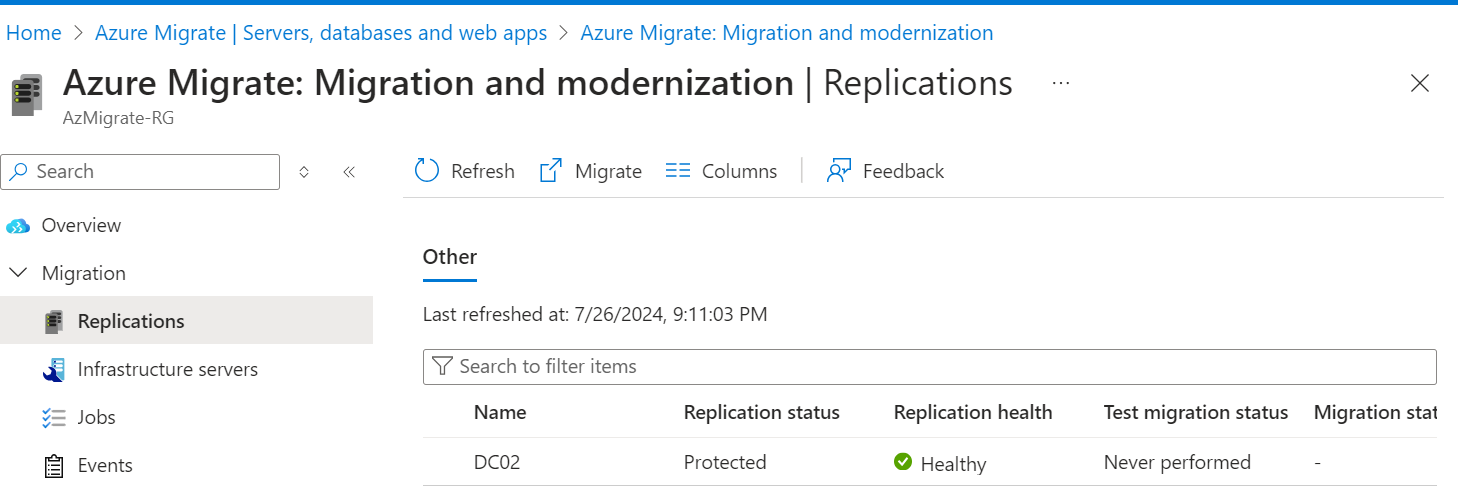
Once replication is complete, you can perform a test migration. Be careful, as this will bring the server online in Azure. Consider turning off the on-premises server before the test to avoid conflicts.

After testing, clean up the test migration to remove the test VMs.


After verification, you can finalize the migration.
This concludes the detailed process of migrating physical VMs using Azure Migrate with private endpoints.
No comments yet.